CheckMK
Monitoring Software
- Introduction
- Installation
- Securing the webinterface
- checkmk Agent installation on linux
- Agent installation on TrueNAS
- SNMP Configuration for mikrotik routers
- Integration of Proxmox VE
- Monitoring of docker services
Introduction
![]()
Introduction
Checkmk is a comprehensive solution for monitoring of applications, servers, and networks. This vast set of features was designed in collaboration with our customers over many years. Checkmk is easy to learn and use, but powerful enough for the most complex IT environments.
Checkmk is available in four editions:
- an open source edition (Checkmk Raw Edition)
- a commercial enterprise-grade edition (Checkmk Enterprise Edition)
- a commercial edition with advanced cloud monitoring features (Checkmk Cloud Edition)
- an edition for managed services providers (Checkmk Managed Services Edition)
These Checkmk Editions are available for a range of platforms, in particular for various versions of Debian, Ubuntu, SLES and Red Hat, and also as a Docker Image. In addition, physical appliances of various sizes as well as a virtual appliance are offered to simplify the administration of the underlying operating system through a graphical user interface and to enable high-availability solutions.
The agents used by Checkmk to collect data are available for 11 platforms, including Windows.
This manual describes the installation on portainer.
Features
- Monitoring
- Highly automated
- Massively scalable
- Extensible
checkmk provides integrations for important products, such as:
- Proxmox
- Linux
- Apache
- MikroTik
- Dell
- Qnap
- docker
Requirements
- Ubuntu Server 22.04 LTS
- Apache
- ssh
History
I installed the "free" enterprise edition, however, after 30 days it is not so free after all. The amount of hosts is limited to 25. After I enabled another feature, it counted PVE subsystems as hosts and the host count was suddenly 59. The whole suite stopped working. Therefore it is necessary to install it again. This time I will use the raw edition on portainer.
Installation
Installation on Linux
Download
You can download the current version here:
After selecting the desired version it will create a command. Copy the command and execute in a Linux terminal. It looks like this:
wget https://download.checkmk.com/checkmk/2.2.0p20/check-mk-raw-2.2.0p20_0.bookworm_amd64.debInstallation
copy the command from the webpage and execute in a Linux terminal
sudo apt install ./check-mk-raw-2.2.0p17_0.bookworm_amd64.debCreate a checkmk monitoring site
sudo omd create monitoringThe output will look like this:
Output
Adding /opt/omd/sites/monitoring/tmp to /etc/fstab.
Creating temporary filesystem /omd/sites/monitoring/tmp...OK
Restarting Apache...OK
Created new site monitoring with version 2.2.0p17.cre.

    The site can be started with omd start monitoring.
    The default web UI is available at http://your_server/monitoring/

    The admin user for the web applications is cmkadmin with password: generated-password
    (It can be changed with 'htpasswd -m ~/etc/htpasswd cmkadmin' as site user.)
    Please do a su - monitoring for administration of this site.
Grab the password and change it.
omd start monitoringInstallation on Portainer
I grabbed a nice cocker compose file, created a new stack and copied the contents of the docker compose file.
version: '3.1'
services:
  controll:
    image: checkmk/check-mk-raw:2.0.0-latest
    tmpfs:
     - /opt/omd/sites/cmk/tmp:uid=1000,gid=1000
    ulimits:
      nofile: 1024
    container_name: checkmk
    restart: always
    volumes:
      - '/etc/localtime:/etc/localtime:ro'
      - './odm-sites:/omd/sites'
    ports:
      - '8095:5000'
      - '6557:6557'
The password can be seen in the log (Quick actions). And the password can be changed on the console (Quick actions).
htpasswd /opt/omd/sites/cmk/etc/htpasswd cmkadminYou can login here:
http://portainer.simmy.ch:8095
Securing the webinterface
So far I couldn't make that working.
Useful link
Docs: Securing the Webinterface
Activating the Apache modules
a2enmod ssl
systemctl restart apache2
locate the certificate file:
find /etc/apache2/ -type f -exec grep -Hn '^\s*SSLCertificate.*File' {} \;/etc/apache2/sites-enabled/000-default
RewriteEngine On
# Never forward request for .well-known (important when using Let's Encrypt)
RewriteCond %{REQUEST_URI} !^/.well-known
# Next 2 lines: Force redirection if incoming request is not on 443
RewriteCond %{SERVER_PORT} !^443$
RewriteRule (.*) https://%{HTTP_HOST}$1 [L]
# This section passes the system Apaches connection mode to the
# instance Apache. Make sure mod_headers is enabled, otherwise it
# will be ignored and "Analyze configuration" will issue "WARN".
<IfModule headers_module>
    RequestHeader set X-Forwarded-Proto expr=%{REQUEST_SCHEME}
    RequestHeader set X-Forwarded-SSL expr=%{HTTPS}
</IfModule>
checkmk Agent installation on linux
Download the Agent
Setup --> Agents --> "Windows, Linux, Solaris, AIX" --> Related --> "Linux, Solaris, AIX" --> right click on the file --> Copy link address
Install the Agent
For Debian based systems
wget http://syslog.simmy.ch/monitoring2/check_mk/agents/check-mk-agent_2.2.0p17-1_all.deb
apt install ./check-mk-agent_2.2.0p17-1_all.deb
if ufw is active, then you have to enable the service port:
ufw allow 6556For Red Hat/Fedora based systems
wget http://syslog.simmy.ch/monitoring2/check_mk/agents/check-mk-agent-2.2.0p17-1.noarch.rpm
sudo yum install -y -q check-mk-agent-2.2.0p17-1.noarch.rpm -y
Open the firewall for checkmk-agent on port 6556
For Univention based systems
Installationsanleitung checkmk 2.0 check_mk_agent auf UCS 5.0
Register agent to the monitoring server
cmk-agent-ctl register --hostname $(hostname -f) --server syslog.simmy.ch --site monitoring2 --user cmkadminUseful commands
ss -tulpn | grep 6556
echo | nc <localhost> 6556
cmk-agent-ctl status
Agent installation on TrueNAS
Download the Agent
Setup --> Agents --> "Windows, Linux, Solaris, AIX" --> Related --> "Linux, Solaris, AIX" --> right click on .deb file --> Copy link address
Then you will have the address of the .deb file, which can be downloaded with wget:
wget http://syslog.simmy.ch/monitoring2/check_mk/agents/check-mk-agent_2.2.0p17-1_all.debInstall the Agent
For some reason the apt program is not an executable. So the first step is to make this file executable.
chmod +x /usr/bin/apt
apt install ./check-mk-agent_2.2.0p17-1_all.deb
if ufw is active, then you have to enable the service port:
ufw allow 6556Register agent to the monitoring server
cmk-agent-ctl register --hostname $HOSTNAME.simmy.ch --server syslog.simmy.ch --site monitoring2 --user cmkadminUseful commands
ss -tulpn | grep 6556
echo | nc <localhost> 6556
cmk-agent-ctl status
SNMP Configuration for mikrotik routers
Configuration on mikrotik
IP --> SNMP --> Communities
Create community simmy with high encryption
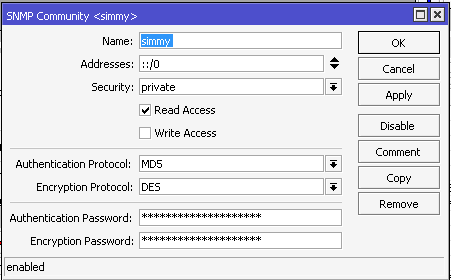
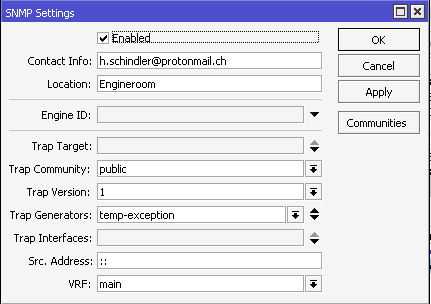
Enable and select the trap community
Configuration on checkmk
I created a folder for all mikrotik devices.
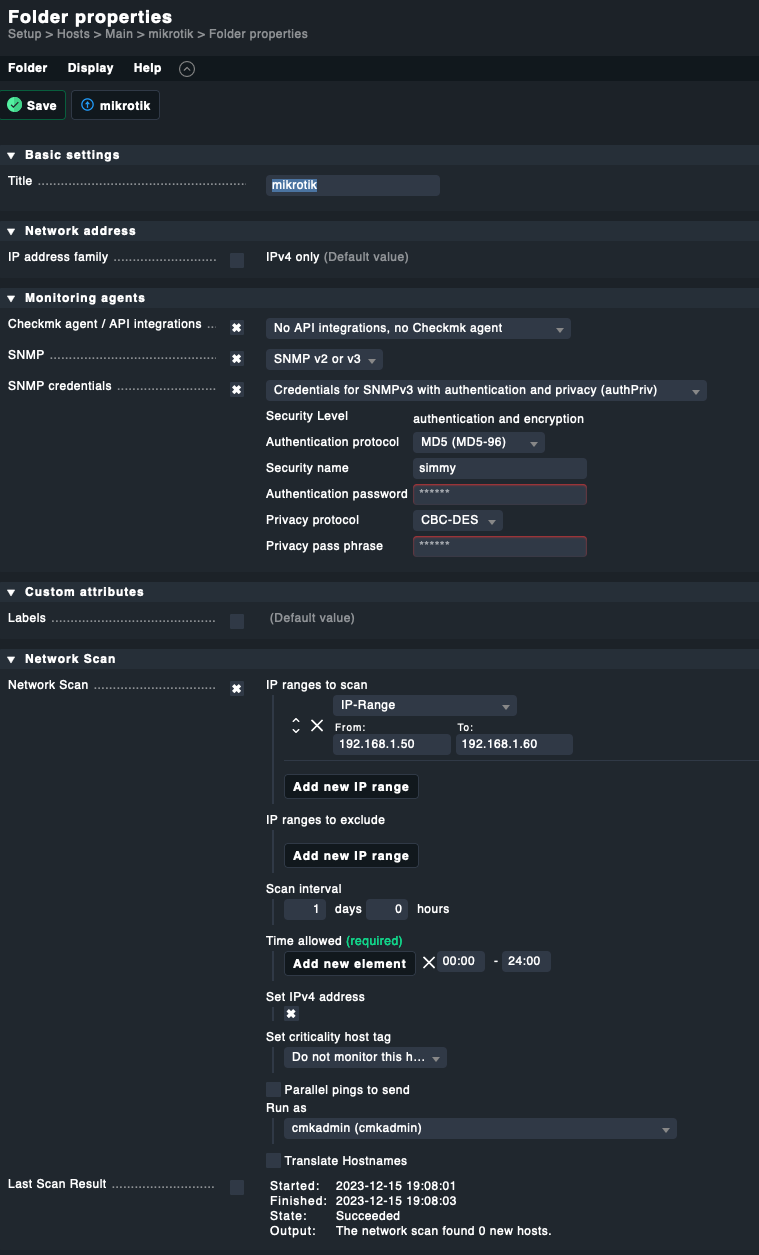
Use the same community and passwords as above!
For the network scan I limited the IP-Range to the range where all mikrotik devices have their IP address.
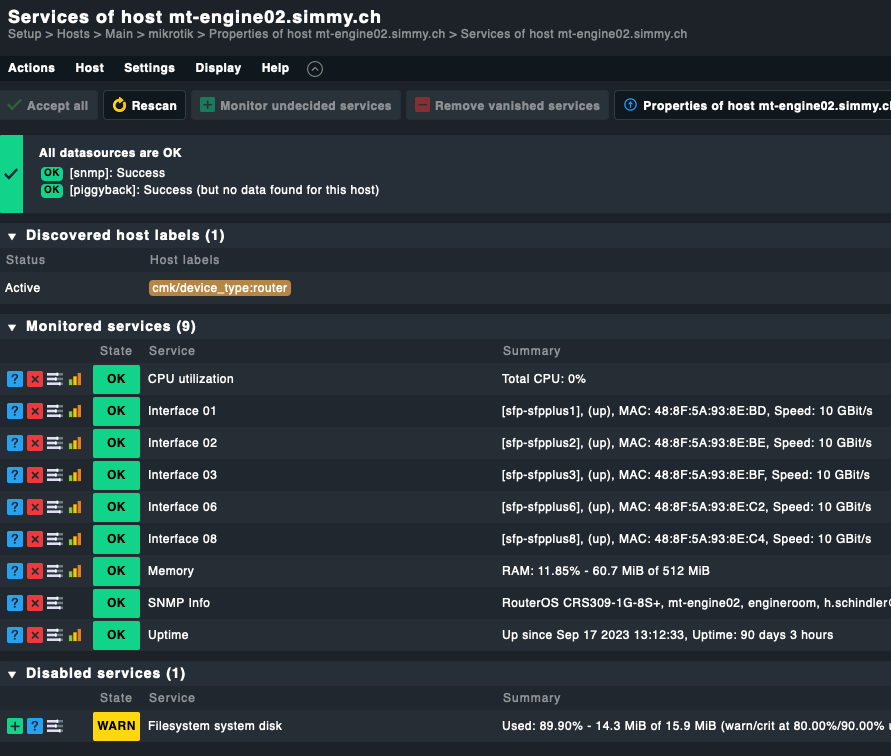
On most of the devices I disabled the "Filesystem system disk" check, hence it would always trigger an alarm on the mikrotik defaults.
Integration of Proxmox VE
Configuration on Proxmox VE
Create a group named read_only.
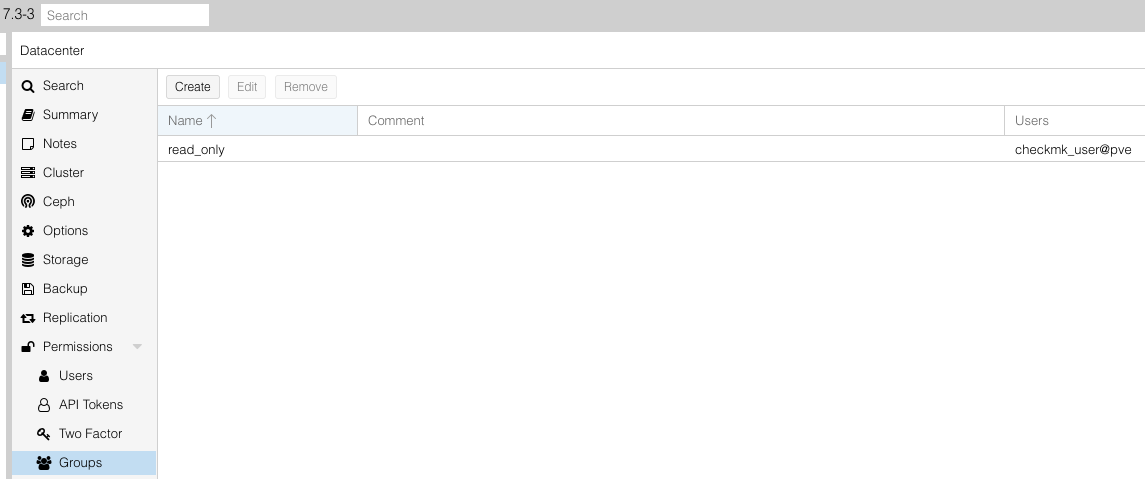
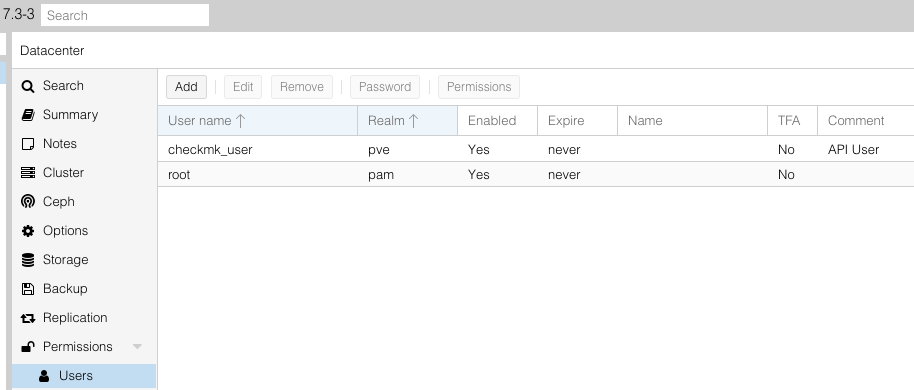
Create a user named checkmk_user and add it to the group read_only.
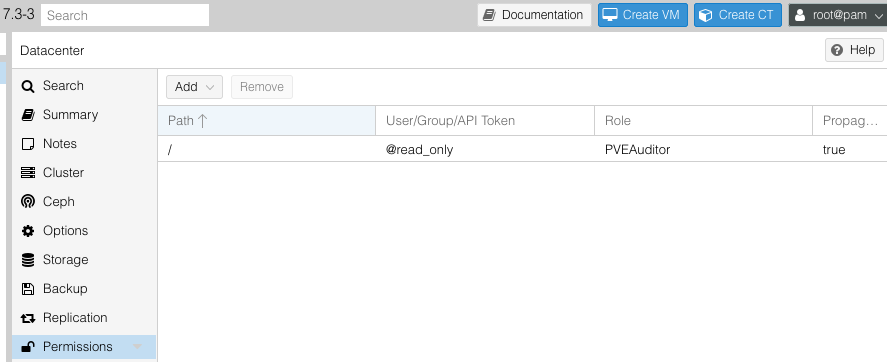
Add a group Permission:
Install the Linux client.
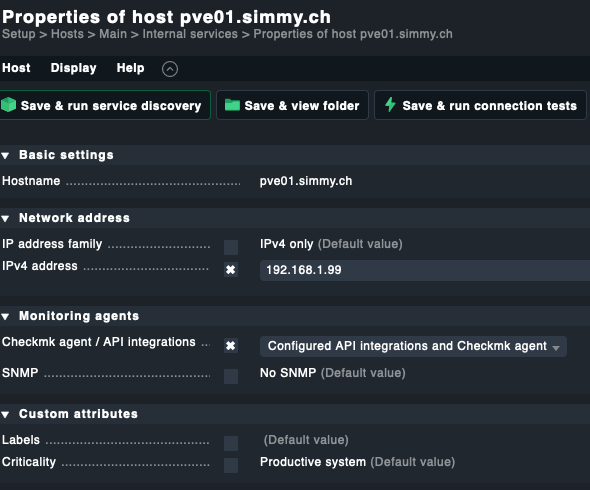
Configuration on checkmk
Setup --> Hosts --> find and select properties of host
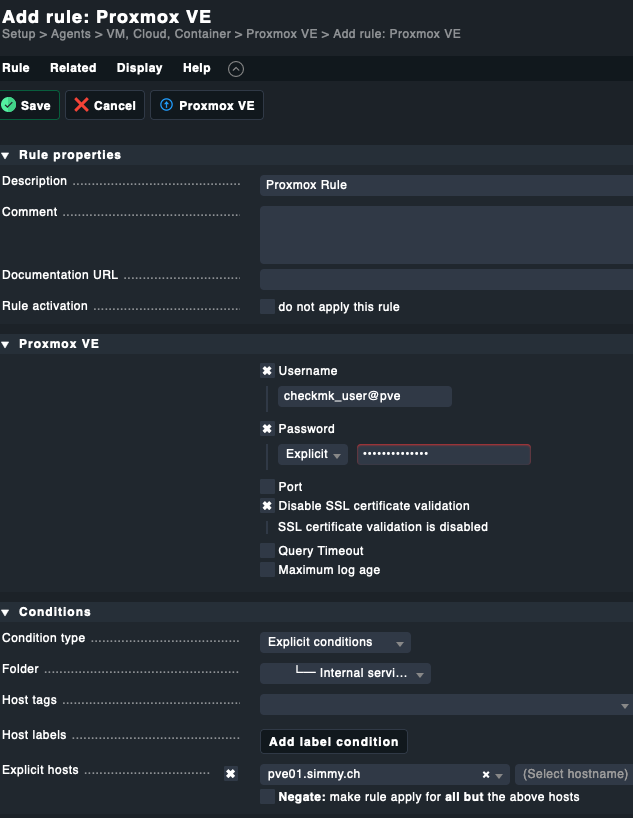
Setup --> Agents --> VM, Cloud, Container --> Proxmox VE --> Add rule
Useful links
https://docs.checkmk.com/latest/en/
Monitoring of docker services
Configuration
A very good description can be found here:
Install the agent
You will need the mk_docker.py agent plug-in, which you can find here: Setup > Agents > Other operating systems > Plugins
wget http://syslog.simmy.ch/monitoring2/check_mk/agents/plugins/mk_docker.pyInstall the plug-in to the agent’s plug-in folder (usually /usr/lib/check_mk_agent/plugins).
install -m 0755 mk_docker.py /usr/lib/check_mk_agent/pluginscreate the config file
Create the configuration file /etc/check_mk/docker.cfg on the Docker host. A template with detailed explanations can be found in the Checkmk directory ~/share/check_mk/agents/cfg_examples/docker.cfg.
# Copyright (C) 2019 tribe29 GmbH - License: GNU General Public License v2
# This file is part of Checkmk (https://checkmk.com). It is subject to the terms and
# conditions defined in the file COPYING, which is part of this source code package.

# This is an exaple configuration file for the plugin
#
#     mk_docker.py
#
# It is designed to give you an impression of available
# options. The specific choice in this file is a valid setup,
# but probably not suitable for your use case.
# If you intend to run the plugin with the default options,
# you do not need any configuration file at all.

# You must specify one section of the name DOCKER (additional sections are ignored).
[DOCKER]

# SELECTION OF AGENT SECTIONS (SERVICES) TO CREATE
# If some of the sections take too long to run, and you don't need them, you
# can disable them by specifying a comma separated list (Default: empty string
# - run all sections). To disable the sections <<<docker_node_disk_usage>>>
# and <<<docker_node_images>>>, for example, provide:
skip_sections: docker_node_disk_usage,docker_node_images
# You may skip any of the following sections:
#  * docker_node_disk_usage:     get df like info of disk usage (may take long)
#  * docker_node_images:         get detailed information on all images and containers
#                                (for HW/SW inventory)
#  * docker_node_network:        get network information
# The following sections send piggyback information to monitored containers:
#  * docker_container_node_name: display nodes name on container
#  * docker_container_status:    container status/health according to docker health API
#  * docker_container_labels:    containers labels
#  * docker_container_network:   containers network configuration
#  * docker_container_agent:     retrieve information by running the
#                                check_mk_agent inside the container
# If no agent was installed on the container:
#  * docker_container_mem:       container memory stats
#  * docker_container_cpu:       container cpu utilization
#  * docker_container_diskstat   container disk stats

# CONTAINER ID
# You can choose what to use as the container identifier. This will
# affect the name used for the piggyback host corresponding to the
# container, as well as items for services created on the node for each
# container.
# By default, the identifier is assumed to be the first 12 characters
# of the container UUID. You can choose to use the full ID or the containers
# name instead. Allowed values are "short" (the default), "long" and "name".
container_id:   name


# BASE URL
# By default we are trying to connect to the docker API engine
# via the unix socket:
base_url: unix://var/run/docker.sock
Settings in the GUI
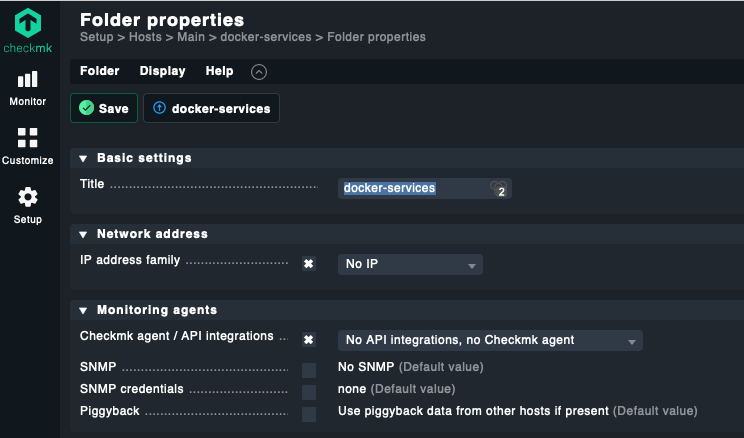
In addition I created a folder with the name docker-services:
I had to add hosts with the names of the docker containers.
That's all.