Knowledge base
tips & tricks
- Set system time automatically on Linux
- Linux Tips and Tricks
- Start / Stop /Restart BIND DNS Server
- Install network scanner on Archlinux
- Install xrdp on Fedora 42
- Install send mail service on Fedora
- Install send mail service on Debian
- Install xrdp on Fedora Xfce
- Add a user to the sudoers group on Debian 13
- Verify NFS export
- Add E-Mail account to MS Outlook
- Add M365 account to Apple Mail
- MacOS Tips & Tricks
- How to Disable SIP
- MacOS - Flush DNS Cache
- MacOS - Privacy hint / OCSP patch
- Map a shared drive on MacOS
- Proxmox Virtual Environment - PVE
- Import the voyager Root Certificate into your system
- Add custom certificates to Apache
- Add metager as search engine to your browser
- Thunderbird
- CSA Webflow
- Docker Tips & Tricks
Set system time automatically on Linux
Introduction
It is possibly to set and synchronize the time in Linux automatically through the systemd service. It's the successor of NTP daemon. In my network the mt-engine01.simmy.ch provides system time. Hence the device can change, I created an DNS alias ntp.simmy.ch. Using this alias allows changes of the time source without problems.
Ubuntu 22.04 LTS
nano /etc/systemd/timesyncd.confThis file is part of systemd.
#
# systemd is free software; you can redistribute it and/or modify it under the
# terms of the GNU Lesser General Public License as published by the Free
# Software Foundation; either version 2.1 of the License, or (at your option)
# any later version.
#
# Entries in this file show the compile time defaults. Local configuration
# should be created by either modifying this file, or by creating "drop-ins" in
# the timesyncd.conf.d/ subdirectory. The latter is generally recommended.
# Defaults can be restored by simply deleting this file and all drop-ins.
#
# See timesyncd.conf(5) for details.
[Time]
NTP=ntp.simmy.ch
FallbackNTP=0.pool.ntp.org, 1.pool.ntp.org, 2.pool.ntp.org
#RootDistanceMaxSec=5
#PollIntervalMinSec=32
#PollIntervalMaxSec=2048systemctl restart systemd-timesyncdDebian
apt install systemd-timesyncd
nano /etc/systemd/timesyncd.conf
# This file is part of systemd.
#
# systemd is free software; you can redistribute it and/or modify it under the
# terms of the GNU Lesser General Public License as published by the Free
# Software Foundation; either version 2.1 of the License, or (at your option)
# any later version.
#
# Entries in this file show the compile time defaults. Local configuration
# should be created by either modifying this file, or by creating "drop-ins" in
# the timesyncd.conf.d/ subdirectory. The latter is generally recommended.
# Defaults can be restored by simply deleting this file and all drop-ins.
#
# See timesyncd.conf(5) for details.
[Time]
NTP=ntp.simmy.ch
FallbackNTP=0.pool.ntp.org, 1.pool.ntp.org, 2.pool.ntp.org
#RootDistanceMaxSec=5
#PollIntervalMinSec=32
#PollIntervalMaxSec=2048
systemctl restart systemd-timesyncdSet the correct timezone
Figure out the timezone:
timedatectl list-timezones | grep EuropeSet the timezone
timedatectl set-timezone Europe/ZurichUseful commands / checks
root@iVentoy ~# timedatectl status
               Local time: Sat 2024-01-06 16:21:29 CET
           Universal time: Sat 2024-01-06 15:21:29 UTC
                 RTC time: Sat 2024-01-06 15:21:29
                Time zone: Europe/Zurich (CET, +0100)
System clock synchronized: yes
              NTP service: active
          RTC in local TZ: no
root@iVentoy ~#
root@iVentoy ~# systemctl status systemd-timesyncd
* systemd-timesyncd.service - Network Time Synchronization
Loaded: loaded (/lib/systemd/system/systemd-timesyncd.service; enabled; preset: enabled)
Active: active (running) since Sat 2024-01-06 15:51:09 CET; 31min ago
Docs: man:systemd-timesyncd.service(8)
Main PID: 3022 (systemd-timesyn)
Status: "Contacted time server 46.140.15.108:123 (0.debian.pool.ntp.org)."
Tasks: 2 (limit: 4650)
Memory: 1.3M
CPU: 39ms
CGroup: /system.slice/systemd-timesyncd.service
`-3022 /lib/systemd/systemd-timesyncd
Jan 06 15:51:09 iVentoy systemd[1]: Starting systemd-timesyncd.service - Network Time Synchronization...
Jan 06 15:51:09 iVentoy systemd[1]: Started systemd-timesyncd.service - Network Time Synchronization.
Jan 06 15:51:09 iVentoy systemd-timesyncd[3022]: Contacted time server 46.140.15.108:123 (0.debian.pool.ntp.org).
Jan 06 15:51:09 iVentoy systemd-timesyncd[3022]: Initial clock synchronization to Sat 2024-01-06 14:51:09.538088 UTC.
root@iVentoy ~#date
Useful links
https://www.digitalocean.com/community/tutorials/how-to-set-up-time-synchronization-on-debian-10
Linux Tips and Tricks
Start / Stop /Restart BIND DNS Server
Introduction
For testing purposes I am using Univention with bind9. The greater goal is to use AD/SAMBA from Univention. After testing for a couple of weeks suddenly some DNS addresses do not get resolved. The same problems occurred on Zentyal.
So far I couldn't find a reason for this misbehavior. However, a restart of the bind9 service seems to patch the problem.
Debian based Linux
Start the service
service bind9 startStop the service
service bind9 stopRestart the service
service bind9 restartReload the service
This will become necessary of a configuration file is changed.
service bind9 reloadCheck status
service bind9 statusFedora based Linux
Start the service
systemctl start namedStop the service
systemctl stop namedRestart the service
systemctl restart namedCheck status
systemctl status namedInstall network scanner on Archlinux
Install the drivers with pamac
run the commandline:
sudo brsaneconfig4 -a name=Brother model=MFC-9330CDW ip=192.168.1.108check if it is working
scanimage -Ldevice `brother4:net1;dev0' is a Brother Brother MFC-9330CDW
device `v4l:/dev/video2' is a Noname Logitech BRIO virtual device
device `v4l:/dev/video0' is a Noname Logitech BRIO virtual devi
Install xrdp on Fedora 42
How to Set Up XRDP on Fedora 42 XFCE
Follow these steps for a reliable and quick XRDP setup with XFCE on Fedora 42:
- Install XRDP and XFCE (if not already installed)
sudo dnf install xrdp xorgxrdp
2. Enable and Start XRDP Service
sudo systemctl enable --now xrdp
3. Configure the Firewall
open Port 3389 for rdp
4. Set Up the XFCE Session for XRDP
Create a file named .Xclients in your home directory with the following content:
echo "xfce4-session" > ~/.Xclients
 echo "xfce4-session" > ~/.Xclients
 chmod +x ~/.Xclients
6. Restart XRDP Services
sudo systemctl restart xrdp
sudo systemctl restart xrdp-sesman
7. Connect via RDP
-
Use Devolutions RDM or any RDP client.
-
Enter your Fedora machine's IP address and credentials.
Summary Table
| Step | Command/Action |
|---|---|
| Install XRDP | sudo dnf install xrdp xorgxrdp |
| Enable & start service | sudo systemctl enable --now xrdp |
| Firewall open port | sudo firewall-cmd --permanent --add-port=3389/tcp; sudo firewall-cmd --reload |
| Configure session | echo "xfce4-session" > ~/.Xclients; chmod +x ~/.Xclients |
| (Optional) SELinux fix | sudo chcon --type=bin_t /usr/sbin/xrdp* |
| Restart XRDP | sudo systemctl restart xrdp xrdp-sesman |
This setup gives you a fast, graphical remote desktop on Fedora XFCE with minimal hassle.
Install send mail service on Fedora
Overview
This guide explains how to set up authenticated email sending from the command line on Fedora using msmtp (a lightweight SMTP client) and s-nail (a mailx-compatible mail utility). This method is ideal for scripts and system notifications in environments where only authenticated SMTP is allowed.
1. Install Required Packages
sudo dnf install -y msmtp s-nail2. Configure msmtp
- Copy the example configuration (optional):
sudo cp /usr/share/doc/msmtp/msmtprc-system.example /etc/msmtprc - Edit
/etc/msmtprcand adjust to your SMTP provider:sudo nano /etc/msmtprcExample configuration:
defaults auth on tls on tls_trust_file /etc/ssl/certs/ca-bundle.crt logfile /var/log/msmtp.log account default host mail.hosting.de port 587 from admin@simmy.org user admin@simmy.org password <super-secret> - Set permissions to protect your password:
sudo chmod 600 /etc/msmtprc
3. Configure s-nail to Use msmtp
Add the following line to /etc/s-nail.rc or your ~/.mailrc:
set mta=/usr/bin/msmtp4. Send a Test Email
echo "This is the body" | mail -s "Test Subject" recipient@example.com- If the command returns no errors, the mail was sent successfully.
- Check
/var/log/msmtp.logfor troubleshooting if needed.
5. Notes
- If you receive an error like "Authenticated user is not permitted to override sender address", ensure the
fromaddress in/etc/msmtprcmatches the authenticated SMTP user, or configure your SMTP provider to allow the desired sender address. - For use in scripts (e.g., backup notifications), simply use the
mailcommand as shown above.
References
- Sending e-mails via mailbox.org with msmtp on Fedora
- Fedora Docs: Mail Servers
- Fedora Forum: Sending mail with the (mailx) command
Install send mail service on Debian
Overview
This guide explains how to set up authenticated email sending from the command line on Debian-based systems (including Proxmox Backup Server) using msmtp (a lightweight SMTP client) and s-nail (a mailx-compatible utility). This is ideal for system notifications, backup/email scripts, and environments with DMARC/SPF filtering where authenticated sending is required.
1. Install Required Packages
apt update
apt install -y msmtp s-nail
2. Configure msmtp
- Create/Edit the global configuration file:
nano /etc/msmtprc - Example
/etc/msmtprc:defaults auth on tls on tls_trust_file /etc/ssl/certs/ca-certificates.crt logfile /var/log/msmtp.log syslog LOG_MAIL account default host mail.hosting.de port 587 from admin@simmy.org user admin@simmy.org password-
Important: "from" and "user" should match your authenticated email address for DMARC/SPF.
-
-
Example 2 /etc/msmtprc
-
syslog LOG_MAIL

defaults
auth on
tls off
tls_trust_file /etc/ssl/certs/ca-certificates.crt
logfile /var/log/msmtp.log

account ucs-backup
host ucs-backup.simmy.ch
port 25
from pbs01@simmy.ch
account default : ucs-backup
-
Use only plain ASCII spaces (no tabs or Unicode spaces).
-
- Set strict permissions:
chmod 600 /etc/msmtprc
3. Configure s-nail or mailx to use msmtp
Add the following line to your /etc/s-nail.rc (system-wide) or ~/.mailrc (per user):
set mta=/usr/bin/msmtp4. Send a Test Email
Use the mail command to test sending:
echo "This is the body" | mail -s "Test Subject" recipient@example.com On success, no output is shown. Check /var/log/msmtp.log or /var/log/mail.log (if syslog is enabled) for debug info if not delivered.
5. Troubleshooting
- If mail arrives in Junk/Spam, create a filter at your destination mailbox to whitelist the sender or move to Inbox.
- If you see an error like “account default was already
Install xrdp on Fedora Xfce
Overview
This document describes how to install and configure the XRDP server on Fedora 43 with the Xfce desktop environment so that Windows, macOS, and Guacamole clients can connect via RDP. Each Linux user who should be able to log in via XRDP needs their own startwm.sh to launch Xfce correctly.
Prerequisites
- Fedora 43 VM or physical host with the Xfce desktop environment installed (PRETTY_NAME="Fedora Linux 43 (Xfce)"). [web:14]
- Root or sudo access on the Fedora system.
- Network connectivity from RDP clients (Windows, macOS, Guacamole) to TCP port 3389 on the Fedora host.
Install and Enable XRDP
Install XRDP and its Xorg backend, then enable and start the service. Fedora 40/41 XRDP documentation uses the same pattern and works on Fedora 43. [web:21][web:17]
sudo dnf install -y xrdp xorgxrdp
sudo systemctl enable --now xrdp
sudo systemctl status xrdp
Open the Firewall for RDP
If firewalld is running, open TCP port 3389 permanently and reload the firewall rules. [web:21][web:17]
sudo firewall-cmd --permanent --add-port=3389/tcp
sudo firewall-cmd --reload
Create startwm.sh for Each User
On Fedora, XRDP uses a per-user startup script named startwm.sh in the user's home directory to start the desktop session. Fedora's XRDP guide shows this pattern for multiple desktops; for Xfce the command is dbus-launch --exit-with-session /usr/bin/startxfce4.
Repeat the following steps for each user account that should be able to log in via XRDP:
# as the target user (not root)
cat > ~/startwm.sh << 'EOF'
#!/bin/sh
export LANG=en_US.UTF-8
export LC_ALL=en_US.UTF-8
exec dbus-launch --exit-with-session /usr/bin/startxfce4
EOF

chmod 755 ~/startwm.sh
Explanation:
dbus-launch --exit-with-sessionensures a proper D-Bus session is created for Xfce, which is required for a fully functional desktop over XRDP./usr/bin/startxfce4starts the Xfce session.chmod 755makes the script executable so XRDP can run it at login.
Optional: Global /etc/xrdp/startwm.sh
If you want a single configuration for all users, you can copy the same script to /etc/xrdp/startwm.sh so XRDP uses it globally. This approach is also referenced in XRDP discussions about custom session commands.
sudo cp /home/<username>/startwm.sh /etc/xrdp/startwm.sh
sudo chmod 755 /etc/xrdp/startwm.sh
sudo systemctl restart xrdp
Replace <username> with a real user name when copying from an existing script.
SELinux Considerations (Optional)
On some Fedora installations, SELinux can interfere with XRDP. Recent XRDP-on-Fedora guides use chcon to assign the bin_t type to XRDP binaries if SELinux denials occur. [web:17]
sudo chcon --type=bin_t /usr/sbin/xrdp
sudo chcon --type=bin_t /usr/sbin/xrdp-sesman
sudo systemctl restart xrdp
Testing with a Native RDP Client
Test XRDP with a standard RDP client before integrating with Guacamole. Fedora XRDP documentation uses Windows Remote Desktop as the reference client. [web:21]
- From a Windows machine, open Remote Desktop Connection (
mstsc.exe). - Enter the Fedora host name or IP (for example
fedora-xfce.example.local) and connect. [web:21] - Log in using a Fedora user that has a
~/startwm.shconfigured. - Verify that an Xfce desktop session appears and is usable.
Using XRDP from Guacamole
Once XRDP and Xfce are working locally, Guacamole can connect using the RDP protocol. The key is to match the security mode and certificate options so that negotiation succeeds.
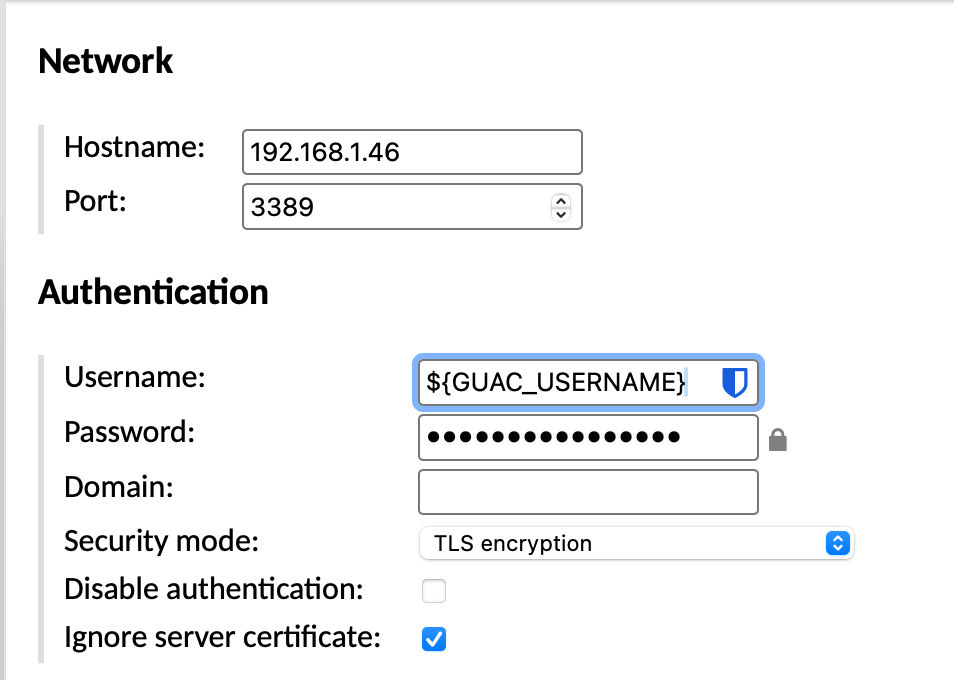
| Setting | Value |
| Protocol | RDP |
| Hostname | IP Address |
| Port | 3389 |
| Username | ${GUAC_USERNAME} |
| Password | ${GUAC_PASSWORD} |
| Security Mode | TLS |
| Ignore server certificate | enable |
Summary
- Install XRDP and Xorg backend with
dnf install -y xrdp xorgxrdp, then enable the service. - Open the firewall for TCP port 3389 if
firewalldis running. - Create a per-user
~/startwm.shcontainingdbus-launch --exit-with-session /usr/bin/startxfce4and make it executable. - Optionally, place the same script at
/etc/xrdp/startwm.shfor a global configuration. - Verify RDP access with a native client (e.g., Windows mstsc), then configure an RDP connection in Guacamole pointing at the Fedora 43 XRDP server.
Add a user to the sudoers group on Debian 13
usermod -aG sudo masterVerify NFS export
Check NFS exports on nas05.simmy.ch from the Linux:
sudo showmount -e nas05.simmy.chAdd E-Mail account to MS Outlook
Introduction
Microsoft 365, Azure or Exchange Server uses a proprietary protocol for E-Mail, Calendar and Contacts/Address Book. It is possible to add multiple E-Mail accounts, either with IMAP, POP3 or M365 to MS Outlook.
Configuration
Goto "Settings" --> Accounts --> Add Account
It looks slightly different on Windows or MacOS
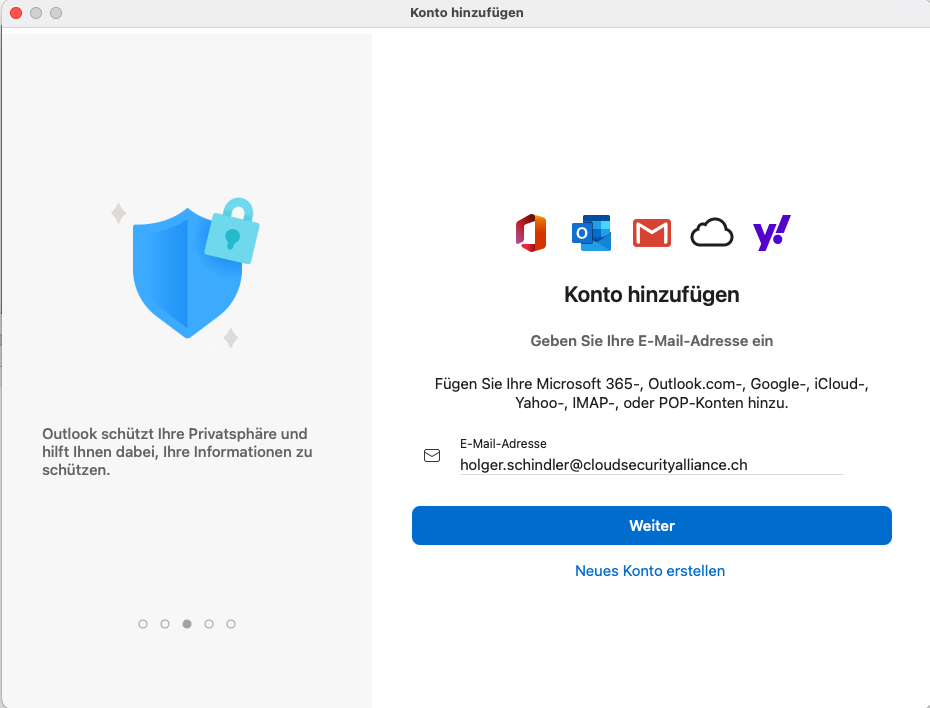
Enter your E-Mail address and click on "continue".
If Outlook does not determine the account type automatically, enter "Microsoft 365".
Follow the instruction on the screen. It will guide you through the log in process. If Outlook ask for the profile type, I recommend "business profile".
You will need your E-Mail address and your password.
Functionality
All functions provided by M365 are supported:
- send E-Mail
- receive E-Mail
- calendar (Appointments)
- addressbook
The addressbook shows only contacts, that you have already contacted. However, you can search the addressbook in the name field by writing three characters of the name of the person you are looking for.
Add M365 account to Apple Mail
Introduction
Microsoft 365, Azure or Exchange Server uses a proprietary protocol for E-Mail, Calendar and Contacts/Address Book. It is possible to add and use E-Mail functionality from Microsoft by adding it to Apple Mail.
Configuration
Open Menu "Mail" --> Settings --> Accounts --> "+"
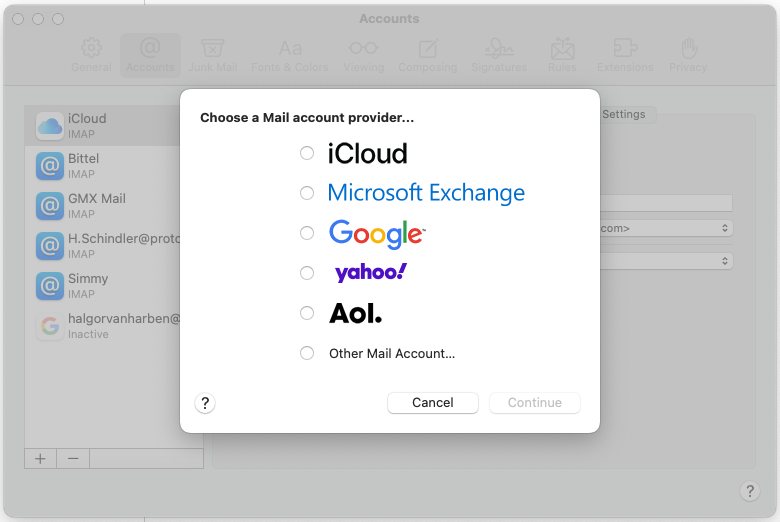
Select "Micosorft Exchange" --> "Continue"
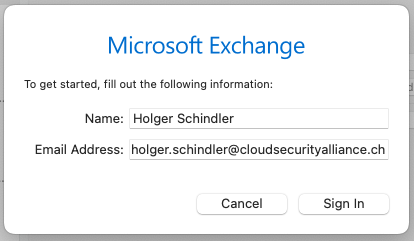
Enter your E-Mail address. Click on "Sign in".
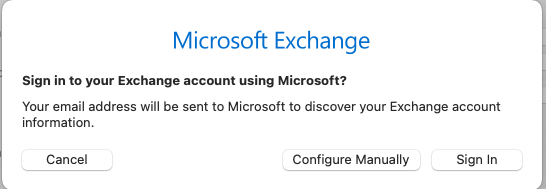
Click "Sign in".
Follow the instruction on the screen to log in. And finally "Accept" the permissions, that Microsoft requests on your Mac Computer.
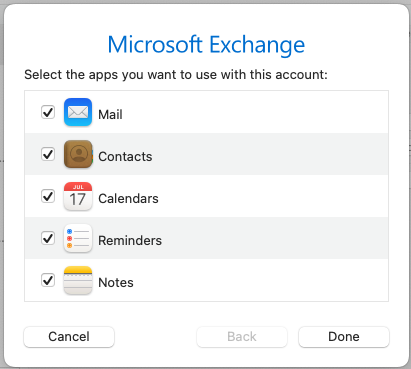
Click "Done".
Functionality
All functions provided by M365 are supported:
- send E-Mail
- receive E-Mail
- calendar (Appointments)
- address book
Calendar
To use the Exchange calendar, you have to utilize "Calendar" on MacOS.
The functionality is limited. It will show all the appointments you have. However, it will not show free or reserved time of other people, hence "Calendar" does not access the address book of the M365 Exchange server. If you create a new appointment, you are also not able to invite other people from the M365 tenant. You have to copy the E-Mail addresses from "Apple Mail" to the invitation.
Address book
To use the address book, you have to utilize "Contacts" on MacOS. Select the correct address book (from the Exchange server). In my case it was: Directories --> Exchange Global Address List.
You can search the address book in the name field by writing three characters of the name of the person you are looking for.
MacOS Tips & Tricks
How to Disable SIP
Introduction
System Integrity Protection (SIP)
SIP protects MacOS from cyber attacks. However, it also prevents the installation of certain software. So it can become necessary to disable SIP temporarily.
Boot into recovery mode
Silicon M1, M2, M3
Shut down your Mac and wait for 20 seconds. Then, hold the power button until you see the "Loading startup options" message under the Apple logo. Then, select Options and click Continue to enter the macOS Recovery screen.
Intel based
Restart your Mac and wait for 30 seconds. Press the power button and immediately hold Command + R keys on the keyboard until you see the Apple logo. Your Mac will boot into macOS Recovery after a while.
Open a terminal
Under utilities, you will find "Terminal". Open it.Type the following command:
csrutil disableAfter that reboot the Mac, make all the necessary changes and enable SIP after that by entering the command:
csrutil enable
MacOS - Flush DNS Cache
Introduction
For some reasons Apple nurses a bug in the DNS resolver. This leads to the problem, that some FQDNs cannot be resolved correctly. The workaround is quite simple.
Resolution
sudo dscacheutil -flushcache
sudo killall -HUP mDNSResponder
MacOS - Privacy hint / OCSP patch
Introduction
The Online Certificate Status Protocol (OCSP) is an Internet protocol used for obtaining the revocation status of an X.509 digital certificate.It is described in RFC 6960 and is on the Internet standards track. It was created as an alternative to certificate revocation lists (CRL), specifically addressing certain problems associated with using CRLs in a public key infrastructure (PKI). Messages communicated via OCSP are encoded in ASN.1 and are usually communicated over HTTP. The "request/response" nature of these messages leads to OCSP servers being termed OCSP responders.
The OCSP protocol is used to check whether or not a certificate has been revoked. In this context, it is used to give Apple the opportunity to revoke the “blessing” it has given to a specific piece of software. Whenever you start an application, MacOS checks back with the OCSP server.
Resolution
There are two ways to prevent MacOS from checking back to Apple.
Local patch
echo 0.0.0.0 ocsp.apple.com | sudo tee -a /etc/hostsRouter patch
Discussion
In fact, Apple does not associate the information coming with this request to any person or any IP address. Apple does also not track, when you start an application. Apple could figure out, which software vendor an application is coming from (thinking about Microsoft, that leaves a lot of possibilities).
In the end, it is a simple check whether a certificate is valid or not.
Security professional criticized that a man in the middle attack is possible and you might start an application of which the certificate is revoked. The data itself is also transferred over HTTP without encryption. So a 3rd party could get an idea than somebody runs software from a specific software vendor.
Keeping aside the security concerns, it could be a little bit slower to start an application with a low bandwidth internet connection. In that case, it could make sense to block the request.
Useful links
https://www.sentinelone.com/blog/what-happened-to-my-mac-apples-ocsp-apocalypse/
Map a shared drive on MacOS
Introduction
Mapping of network drive seems to be a big issue. Hopefully this manual brings a little light into the fog.
Requirements
Any kind of network resource, that offers any kind of network share. A network resource can be:
- Windows Server
- Linux Server
- NAS (Network attaches storage)
- SMB or SAMBA
- CIFS
- NFS
- (FTP (SFTP))
- AFP (Apple File Protocol)
This manual will focus on SMB
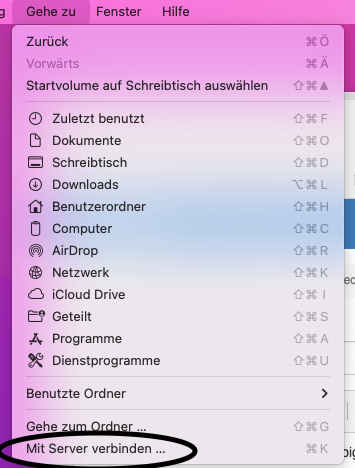
Map a drive with MacOS and Finder
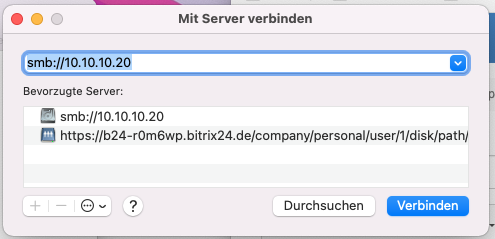
Open Finder and go to this menu or simply press cmd-k
Finder will provide you with a list of network resources it already found:
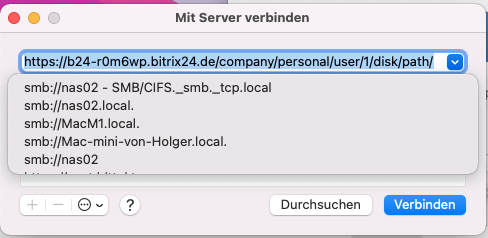
If you can already see your resource, you can click on it. If not, you will need to input the resource manually. You will need the protocol and ether the IP Address or an DNS name.
Finder understands these protocols:
- smb
- cifs (http, https)
- ftp
- afp
If our resource is located on nas01.simmy.ch and the protocol is smb, you will have to type in:
smb://nas01.simmy.ch
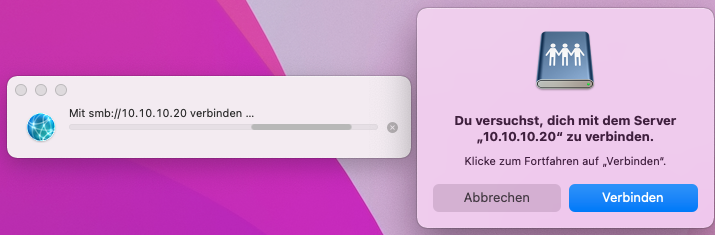
Most resources are protected with username and password:
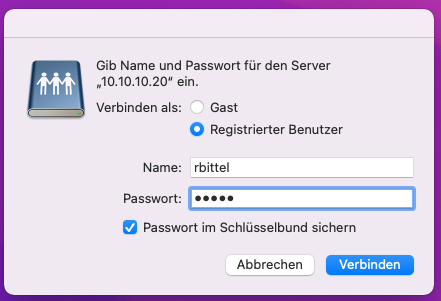
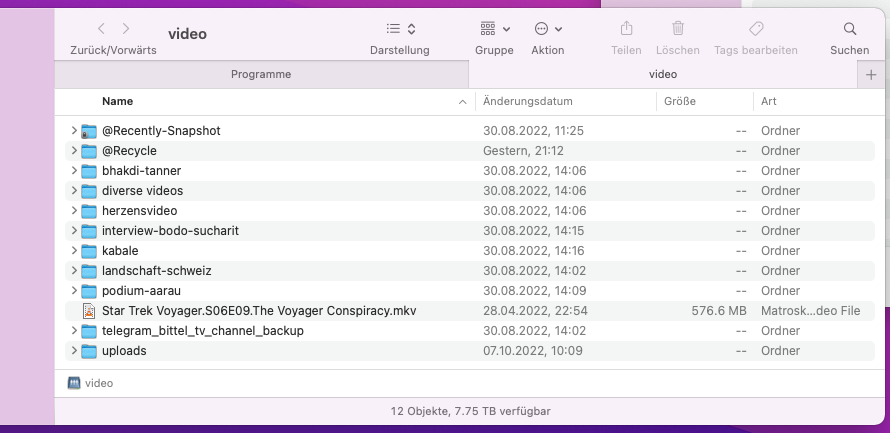
If you manage to enter your username and password correct, please select the resource, you want to access:

Next thing you will see is the data, that is located on the network share:
Proxmox Virtual Environment - PVE
PVE - VM does not stop
Introduction
Sometimes a virtual machine cannot be stopped from the GUI.
Resolution
qm stop <number>Useful links
https://bobcares.com/blog/proxmox-cant-stop-vm/
PVE - No quorum error
Introduction
A typical error on a PVE cluster is
No Quorum error
It can happen, when other machines of the cluster stop functioning.
Resolution
pvecm expect 1Useful links
PVE - Can't lock file
Can't lock file
manual SSH:
goto /run/lock/qemu-server
delete lock-xxx.conf
qm unlock xxx
Simple script:
#!/bin/sh
echo
echo '-----AUTHOR: https://dannyda.com-----'
echo
echo '---Existing locks---'
qm unlock $1
ls -l /run/lock/qemu-server
rm -f /run/lock/qemu-server/lock-$1.conf
qm unlock $1
echo
echo '---Remaining locks---'
ls -l /run/lock/qemu-server
./killvm.sh xxx Import the voyager Root Certificate into your system
Introduction
To ease the use of servers/services of this domain it is recommended to trust the root certificate of this domain. This text describes how-to import the root certificate and start trust the different serves/services
Vivaldi
The Vivaldi browser is not so straight forward. You have to enter
chrome://settings/certificates
Then it will display the certificate management; goto "Authorities":
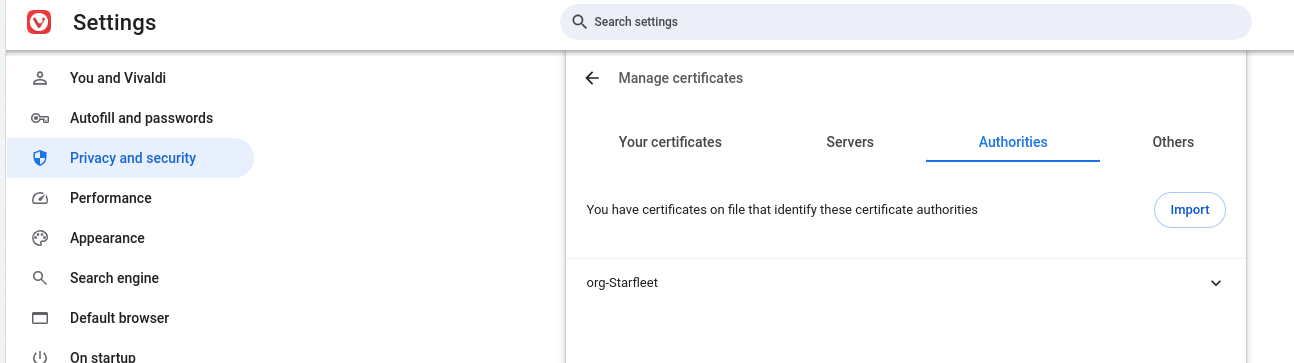
"Import" all certificates you need.
Don't forget to trust them.
Brave
Goto to the settings menu of your browser. Usually on the right upper corner.
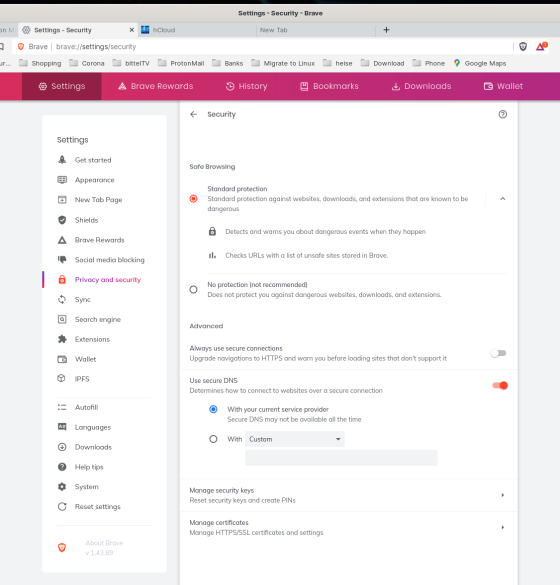
From the opening menu choose "Settings".
Search for "certificate" or go to Privacy and Security Settings and choose "Manage certificates".
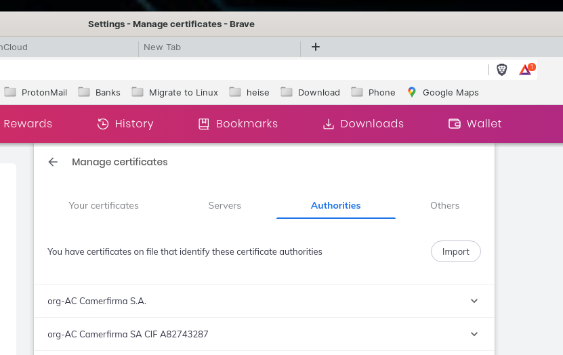
Select ca_simmy.ch.crt
Make sure that under trust settings "Trust this certificate for identifying websites" is enabled. The other options are for future use.

Windows
Import the certificate to your local certificate store.
Dafür "Computerzertifikate verwalten" aufrufen. Beim Punkt "Vertrauenswürdige Stammzertifizierungsstellen" mit der rechten Maustaste klicken: Alle Aufgaben - Importieren
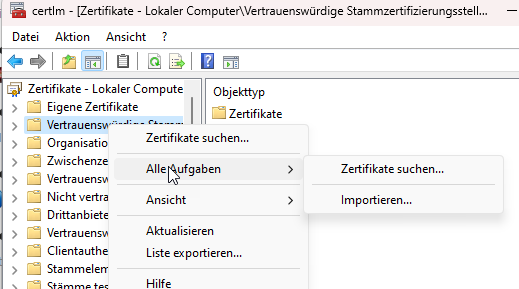
ACHTUNG: Nicht unter "Eigene Zertifikate" speichern, das Zertifikat funktioniert dort nicht!
Danach einfach die Masken jeweils bestätigen. Hier nochmals der Pfad:
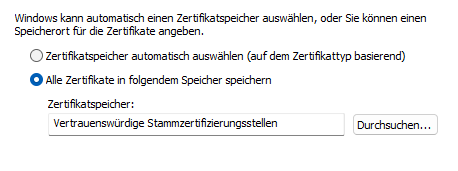
Schliesslich auf "Fertig stellen" und freuen, dass die Verbindung nun verschlüsselt ist.
iOS
bei iphone kann ich dir sagen: pack dir das irgendwo per web erreichbar, am besten in deinem LAN, rufe dann die .crt-datei mit -safari- auf und sage dem browser dann, dass er das crt installieren darf. das ist bisher die zuverlässigste variante. alles andere via "apple dateien" oder seafile oder oder funktionieren nicht, da der trigger nicht initiiert wird
Patrick Beck, 23.10.2022
Download certificate
Upper left corner, ca_simmy.crt.
Add custom certificates to Apache

Introduction
In numerous cases you want to enable https on a webserver like Apache. So I decided a once and for all documentation for it.
Configuration
a2enmod ssl
a2enmod rewrite
systemctl restart apache2
Edit the Apache configurationf file /etc/apache2/apache2.conf
Add at the end:
<Directory /var/www/html>
         AllowOverride All
</Directory>
Edit the Apache configuration file for the default website: /etc/apache2/sites-enabled/000-default.conf
<VirtualHost *:443>
        # The ServerName directive sets the request scheme, hostname and port that
        # the server uses to identify itself. This is used when creating
        # redirection URLs. In the context of virtual hosts, the ServerName
        # specifies what hostname must appear in the request's Host: header to
        # match this virtual host. For the default virtual host (this file) this
        # value is not decisive as it is used as a last resort host regardless.
        # However, you must set it for any further virtual host explicitly.
        #ServerName www.example.com

        ServerAdmin webmaster@localhost
        DocumentRoot /var/www/html

        # Available loglevels: trace8, ..., trace1, debug, info, notice, warn,
        # error, crit, alert, emerg.
        # It is also possible to configure the loglevel for particular
        # modules, e.g.
        #LogLevel info ssl:warn

        ErrorLog ${APACHE_LOG_DIR}/error.log
        CustomLog ${APACHE_LOG_DIR}/access.log combined
        SSLEngine on
        SSLCertificateFile /var/lib/zentyal/conf/ssl/ssl.cert
        SSLCertificateKeyFile /var/lib/zentyal/conf/ssl/ssl.key

        # For most configuration files from conf-available/, which are
        # enabled or disabled at a global level, it is possible to
        # include a line for only one particular virtual host. For example the
        # following line enables the CGI configuration for this host only
        # after it has been globally disabled with "a2disconf".
        #Include conf-available/serve-cgi-bin.conf
</VirtualHost>
You have to add the lines 22, 23 and 24. I use the same certificate all over the system, so I point to already existing certificates.
Restart the service:
service apache2 restartYou might want to insert this at the beginning of the file:
<VirtualHost *:80>
        RewriteEngine On
        RewriteCond %{HTTPS} !=on
        RewriteRule ^/?(.*) https://%{SERVER_NAME}/$1 [R=301,L]
</virtualhost>
Useful links
https://techexpert.tips/apache/enable-https-apache/
Add metager as search engine to your browser
Introduction
MetaGer is a meta-search engine focused on protecting users' privacy. Based in Germany, and hosted as a cooperation between the German NGO 'SUMA-EV - Association for Free Access to Knowledge' and the University of Hannover, the system is built on 24 small-scale web crawlers under MetaGer's own control.
With MetaGer as default searchengine you can instruct your browser to automatically use MetaGer when search queries are entered i.e. into the address bar.
I used to recommend MetaGer as default search engine for the browser. However, it proved to be unreliable. The search result were incomplete.
Features
Search queries are relayed to as many as 50 search engines.The results are filtered, compiled and sorted before being presented to the user. Users can select the search engines to query according to their individual choices among other options (such as "check for availability and sort by date"). Privacy protection is implemented by several features: MetaGer provides access to their services only through encrypted connections. As of December 2013, there is also a TOR Hidden Service (b7cxf4dkdsko6ah2.onion/tor/) that allows users to access the MetaGer search functionality from within the TOR network. Since February 2014 MetaGer additionally offers the option to open the result webpages anonymously ("open anonymously").
Add Metager as search engine
Goto settings --> Search engine --> Add
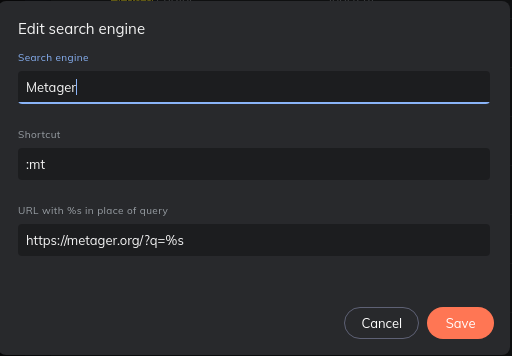
Enter:
Search engine: Metager
Shortcut: :mt
URL: https://metager.org/?q=%s
Set MetaGer as default search engine
MetaGer Apps
MetaGer App
This App brings the full Metager power to your smartphone. Search the web with one touch while preserving your privacy. There are two ways to get our App: install via the Google Playstore or (better for your privacy) get it directly from our server.
MetaGer Maps App
This App provides a native integration of MetaGer Maps (powered by Openstreetmap) on your mobile Android device.
Therefore, the route planner and the navigation service is running very fast on your smartphone. The app is faster compared against the use in a mobile web browser. And there are some more advantages- check it out!
After the first start you will be asked for the following permissions:
- Access to positioning data => With GPS activated we can provide better search results. With this you get access to the step-by-step navigation. Of course, we don't store any of your data and we don't give any of your data to third persons.
- Access to images, media and files on the device => This permit is necessary for the automated update of the App. If there is a newer version it can be stored in your download archive and will be installed automatically. Without this permission you have to do a manual installation every time there is an update.
Useful links
https://restoreprivacy.com/private-search-engine/
Thunderbird
Installation of Thunderbird
Introduction
Prerequisites
Download the newest Version of Thunderbird directly from their Webpage.
Installation
Installation on MacOS
Just click on the downloaded .dmg file and copy it to your programs directory.
Installation on Fedora
tar -xvjf thunderbird-128.3.0esr.tar.bz2
Add Microsoft Outlook Account/Teams to Thunderbird
Introduction
Microsoft 365, Azure or Exchange Server uses a proprietary protocol for E-Mail, Calendar and Contacts/Address Book. It is possible to connect to a Microsoft E-Mail account with Thunderbird. It is also possible to connect to more than one account. Especially if it comes to Teams, which can be used inside of Thunderbird, this feature becomes very useful.
Configuration
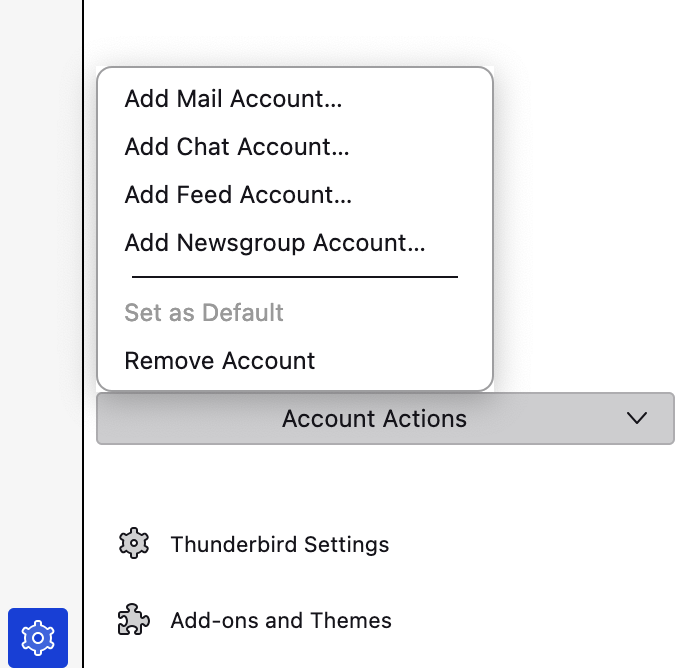
Goto account setting and "Add Mail Account".
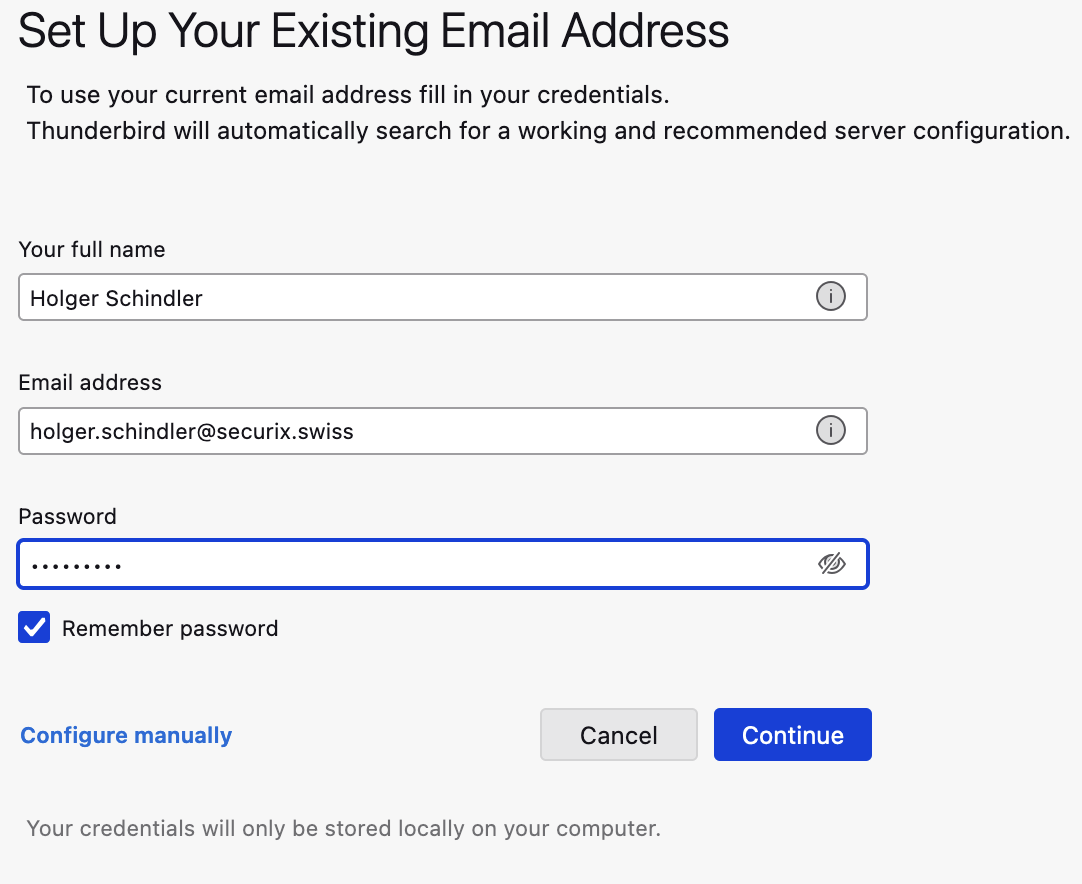
You will need your E-Mail address and your password.
After clicking continue, you will be asked to enter your password again. No matter what happens next, you will return to Thunderbird.
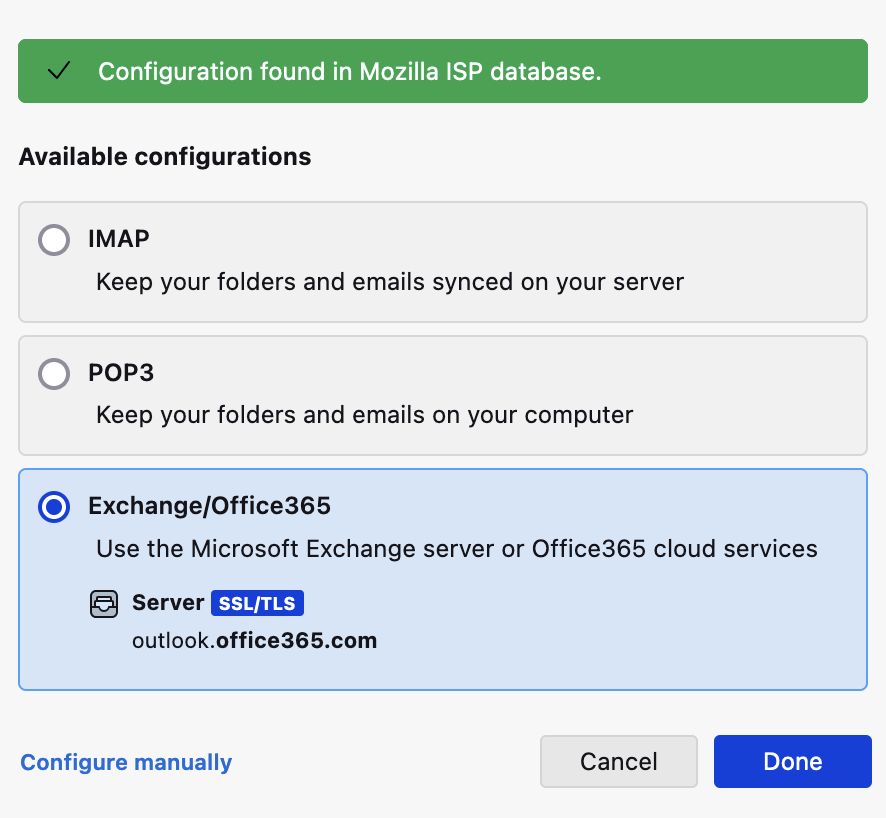
Select "Exchange/Office365" and click on "Done".
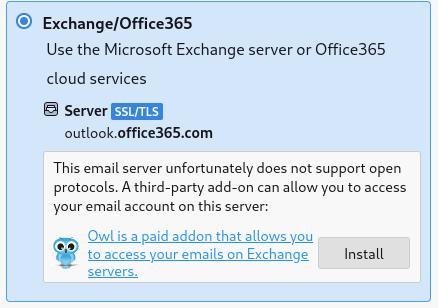
If you are asked to install "OWL", please do it.
Hint
You are now able to use E-Mail and Calendar functionality. So far Contacts/Address book are not working.
Teams:
On the left side you should find the Teams icon. Hover gently over it. It will then show all connected Microsoft Accounts. If you click on one of those account, a new tab will open for teams. Repeat until you opened all the Teams for your tenants.

CSA Webflow
Webflow User Guide
1. Logging In and Dashboard
visit webflow.com/login

Enter username and password.
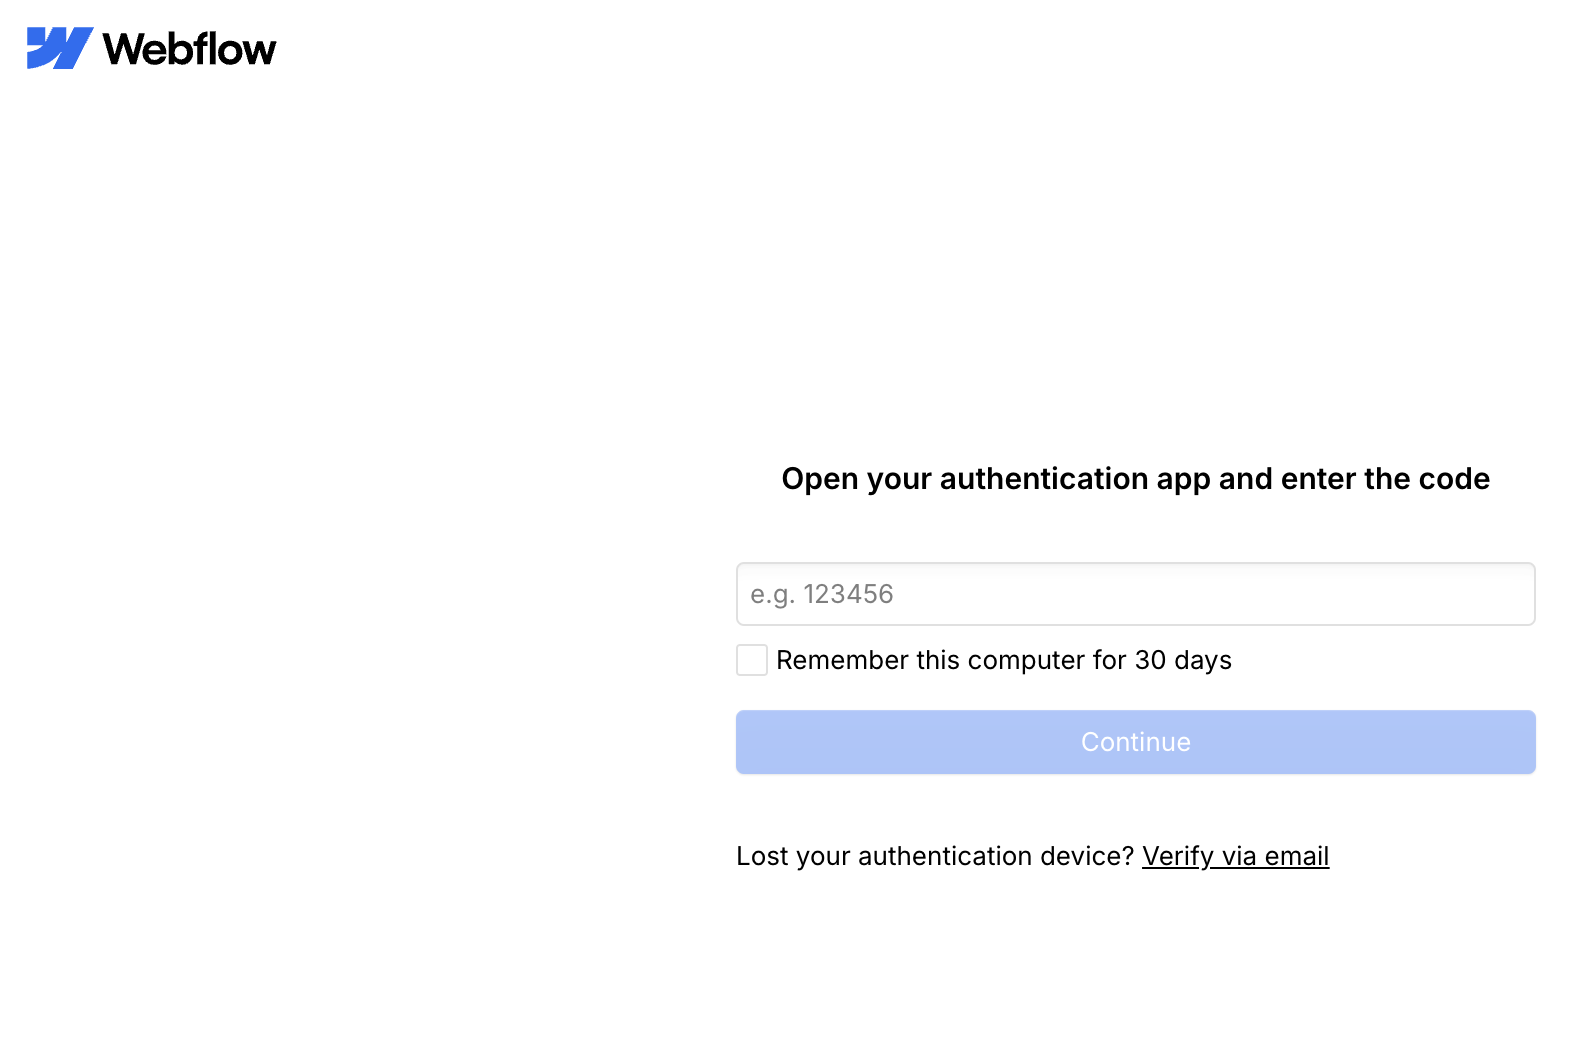
Enter your TOTP Token.
2. Page Settings
3. Designer
3.1 Design Options
3.2 Components
3.3 Variables
3.4 Style Selectors
3.5 Images
4. CMS Functions
4.1 Collections
4.2 Creating and Editing Items
4.3 Text Formatting
4.4 Image Upload
5. Multilingual Support
6. Video Integration
7. Customizing Fields
8. Publishing
9. SEO and Social Media Optimization
9.1 SEO Settings
9.2 Open Graph Settings
9.3 Testing
Tips and Tricks
Docker Tips & Tricks
Name resolution
Introduction
DNS sucks in docker. However, there are two fixes.
Fix no. 1
Create /etc/docker/daemon.json:
{
  "dns": ["192.168.1.2", "192.168.1.25"]
}
sudo systemctl daemon-reload
sudo systemctl restart docker
sudo docker run --rm alpine sh -c "cat /etc/resolv.conf && nslookup hfile.simmy.org"Fix no. 2
Edit etc/default/docker
# Here in Debian, this file is sourced by:
# - /etc/init.d/docker (sysvinit)
# - /etc/init/docker (upstart)
# - systemd's docker.service
# Use of this file for configuring your Docker daemon is discouraged.
# The recommended alternative is "/etc/docker/daemon.json", as described in:
# https://docs.docker.com/engine/reference/commandline/dockerd/#daemon-configuration-file
# If that does not suit your needs, try a systemd drop-in file, as described in:
# https://docs.docker.com/config/daemon/systemd/
# Docker Upstart and SysVinit configuration file
#
# THIS FILE DOES NOT APPLY TO SYSTEMD
#
# Please see the documentation for "systemd drop-ins":
# https://docs.docker.com/engine/admin/systemd/
#
# Customize location of Docker binary (especially for development testing).
#DOCKERD="/usr/local/bin/dockerd"
# Use DOCKER_OPTS to modify the daemon startup options.
DOCKER_OPTS="--dns=192.168.1.2 --dns 192.168.1.25"
# If you need Docker to use an HTTP proxy, it can also be specified here.
#export http_proxy="http://127.0.0.1:3128/"
# This is also a handy place to tweak where Docker's temporary files go.
#export DOCKER_TMPDIR="/mnt/bigdrive/docker-tmp"DOCKER_OPTS="--dns=192.168.1.2 --dns 192.168.1.25"
It's mandatory to keep this DNS configuration up to date. Otherwise NPM will not be able to resolve internal addresses.
sudo systemctl daemon-reload
sudo systemctl restart docker
sudo docker run --rm alpine sh -c "cat /etc/resolv.conf && nslookup hfile.simmy.org"