| Step | Command/Action |
|---|---|
| Install XRDP | `sudo dnf install xrdp xorgxrdp` |
| Enable & start service | `sudo systemctl enable --now xrdp` |
| Firewall open port | `sudo firewall-cmd --permanent --add-port=3389/tcp; sudo firewall-cmd --reload` |
| Configure session | `echo "xfce4-session" > ~/.Xclients; chmod +x ~/.Xclients` |
| (Optional) SELinux fix | `sudo chcon --type=bin_t /usr/sbin/xrdp*` |
| Restart XRDP | `sudo systemctl restart xrdp xrdp-sesman` |
**Important:** "from" and "user" should match your authenticated email address for DMARC/SPF.
3. **Example 2 /etc/msmtprc** 1. ``` syslog LOG_MAIL defaults auth on tls off tls_trust_file /etc/ssl/certs/ca-certificates.crt logfile /var/log/msmtp.log account ucs-backup host ucs-backup.simmy.ch port 25 from pbs01@simmy.ch account default : ucs-backup ``` -Use only plain ASCII spaces (no tabs or Unicode spaces).
4. **Set strict permissions:** ``` chmod 600 /etc/msmtprc ``` ## 3. Configure `s-nail` or `mailx` to use msmtp Add the following line to your `/etc/s-nail.rc` (system-wide) or `~/.mailrc` (per user): ``` set mta=/usr/bin/msmtp ``` ## 4. Send a Test Email Use the mail command to test sending: ``` echo "This is the body" | mail -s "Test Subject" recipient@example.com ``` On success, no output is shown. Check `/var/log/msmtp.log` or `/var/log/mail.log` (if syslog is enabled) for debug info if not delivered. ## 5. Troubleshooting - If mail arrives in Junk/Spam, create a filter at your destination mailbox to whitelist the sender or move to Inbox. - If you see an error like “**account default was already** # Install xrdp on Fedora Xfce ## Overview This document describes how to install and configure the XRDP server on Fedora 43 with the Xfce desktop environment so that Windows, macOS, and Guacamole clients can connect via RDP. Each Linux user who should be able to log in via XRDP needs their own `startwm.sh` to launch Xfce correctly. ## Prerequisites - Fedora 43 VM or physical host with the Xfce desktop environment installed (PRETTY\_NAME="Fedora Linux 43 (Xfce)"). \[web:14\] - Root or sudo access on the Fedora system. - Network connectivity from RDP clients (Windows, macOS, Guacamole) to TCP port 3389 on the Fedora host. ## Install and Enable XRDP Install XRDP and its Xorg backend, then enable and start the service. Fedora 40/41 XRDP documentation uses the same pattern and works on Fedora 43. \[web:21\]\[web:17\] ```bash sudo dnf install -y xrdp xorgxrdp sudo systemctl enable --now xrdp sudo systemctl status xrdp ``` ## Open the Firewall for RDP If `firewalld` is running, open TCP port 3389 permanently and reload the firewall rules. \[web:21\]\[web:17\] ```bash sudo firewall-cmd --permanent --add-port=3389/tcp sudo firewall-cmd --reload ``` ## Create `startwm.sh` for Each User On Fedora, XRDP uses a per-user startup script named `startwm.sh` in the user's home directory to start the desktop session. Fedora's XRDP guide shows this pattern for multiple desktops; for Xfce the command is `dbus-launch --exit-with-session /usr/bin/startxfce4`. Repeat the following steps for **each user account** that should be able to log in via XRDP: ``` # as the target user (not root) cat > ~/startwm.sh << 'EOF' #!/bin/sh export LANG=en_US.UTF-8 export LC_ALL=en_US.UTF-8 exec dbus-launch --exit-with-session /usr/bin/startxfce4 EOF chmod 755 ~/startwm.sh ``` Explanation: - `dbus-launch --exit-with-session` ensures a proper D-Bus session is created for Xfce, which is required for a fully functional desktop over XRDP. - `/usr/bin/startxfce4` starts the Xfce session. - `chmod 755` makes the script executable so XRDP can run it at login. ## Optional: Global `/etc/xrdp/startwm.sh` If you want a single configuration for all users, you can copy the same script to `/etc/xrdp/startwm.sh` so XRDP uses it globally. This approach is also referenced in XRDP discussions about custom session commands. ``` sudo cp /home/| **Setting** | **Value** |
| Protocol | RDP |
| Hostname | IP Address |
| Port | 3389 |
| Username | ${GUAC\_USERNAME} |
| Password | ${GUAC\_PASSWORD} |
| Security Mode | TLS |
| Ignore server certificate | enable |
It looks slightly different on Windows or MacOS
[](https://hwiki.simmy.org/uploads/images/gallery/2024-10/bildschirmfoto-2024-10-03-um-13-54-59.png) Enter your E-Mail address and click on "continue".If Outlook does not determine the account type automatically, enter "Microsoft 365".
Follow the instruction on the screen. It will guide you through the log in process. If Outlook ask for the profile type, I recommend "business profile". You will need your E-Mail address and your password. ## Functionality All functions provided by M365 are supported: - send E-Mail - receive E-Mail - calendar (Appointments) - addressbookThe addressbook shows only contacts, that you have already contacted. However, you can search the addressbook in the name field by writing three characters of the name of the person you are looking for.
# Add M365 account to Apple Mail ## Introduction Microsoft 365, Azure or Exchange Server uses a proprietary protocol for E-Mail, Calendar and Contacts/Address Book. It is possible to add and use E-Mail functionality from Microsoft by adding it to Apple Mail. ## Configuration Open Menu "Mail" --> Settings --> Accounts --> "+" [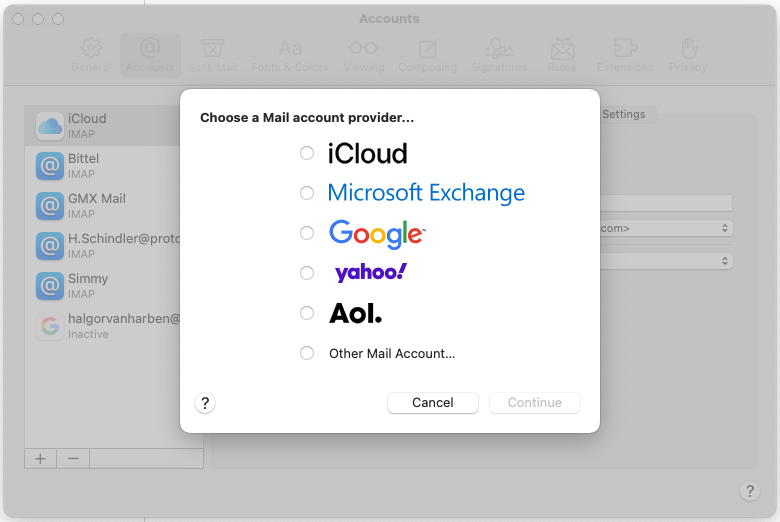](https://hwiki.simmy.org/uploads/images/gallery/2024-10/bildschirmfoto-2024-10-03-um-14-12-48.png) Select "Micosorft Exchange" --> "Continue" [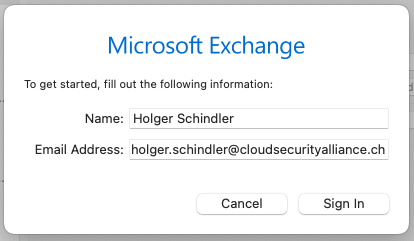](https://hwiki.simmy.org/uploads/images/gallery/2024-10/bildschirmfoto-2024-10-03-um-14-14-42.png) Enter your E-Mail address. Click on "Sign in". [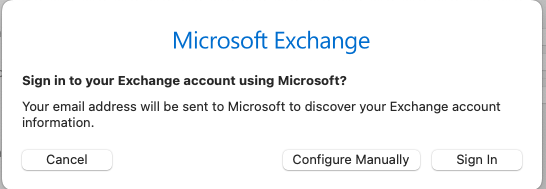](https://hwiki.simmy.org/uploads/images/gallery/2024-10/bildschirmfoto-2024-10-03-um-14-15-56.png) Click "Sign in". Follow the instruction on the screen to log in. And finally "Accept" the permissions, that Microsoft requests on your Mac Computer. [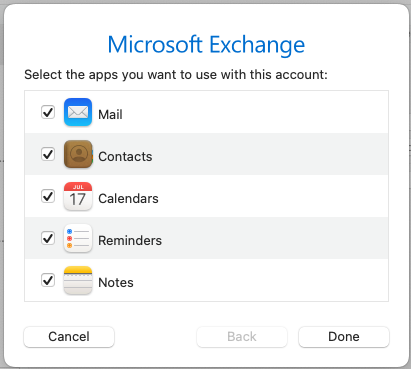](https://hwiki.simmy.org/uploads/images/gallery/2024-10/bildschirmfoto-2024-10-03-um-14-19-12.png) Click "Done". ## Functionality All functions provided by M365 are supported: - send E-Mail - receive E-Mail - calendar (Appointments) - address book ### Calendar To use the Exchange calendar, you have to utilize "Calendar" on MacOS. The functionality is limited. It will show all the appointments you have. However, it will not show free or reserved time of other people, hence "Calendar" does not access the address book of the M365 Exchange server. If you create a new appointment, you are also not able to invite other people from the M365 tenant. You have to copy the E-Mail addresses from "Apple Mail" to the invitation. ### Address book To use the address book, you have to utilize "Contacts" on MacOS. Select the correct address book (from the Exchange server). In my case it was: Directories --> Exchange Global Address List.You can search the address book in the name field by writing three characters of the name of the person you are looking for.
# MacOS Tips & Tricks # How to Disable SIP ## Introduction System Integrity Protection (SIP) SIP protects MacOS from cyber attacks. However, it also prevents the installation of certain software. So it can become necessary to disable SIP temporarily. ## Boot into recovery mode #### Silicon M1, M2, M3 Shut down your Mac and wait for 20 seconds. Then, hold the power button until you see the "Loading startup options" message under the Apple logo. Then, select Options and click Continue to enter the macOS Recovery screen. #### Intel based Restart your Mac and wait for 30 seconds. Press the power button and immediately hold Command + R keys on the keyboard until you see the Apple logo. Your Mac will boot into macOS Recovery after a while. ### Open a terminal Under utilities, you will find "Terminal". Open it.Type the following command: ```bash csrutil disable ``` After that reboot the Mac, make all the necessary changes and enable SIP after that by entering the command: ```bash csrutil enable ``` # MacOS - Flush DNS Cache ## Introduction For some reasons Apple nurses a bug in the DNS resolver. This leads to the problem, that some FQDNs cannot be resolved correctly. The workaround is quite simple. ## Resolution ```bash sudo dscacheutil -flushcache sudo killall -HUP mDNSResponder ``` # MacOS - Privacy hint / OCSP patch ## Introduction The **Online Certificate Status Protocol** (**OCSP**) is an Internet protocol used for obtaining the revocation status of an X.509 digital certificate.It is described in RFC 6960 and is on the Internet standards track. It was created as an alternative to certificate revocation lists (CRL), specifically addressing certain problems associated with using CRLs in a public key infrastructure (PKI). Messages communicated via OCSP are encoded in ASN.1 and are usually communicated over HTTP. The "request/response" nature of these messages leads to OCSP servers being termed *OCSP responders*. [Wikipedia OCSP Protocol](https://en.wikipedia.org/wiki/Online_Certificate_Status_Protocol) The OCSP protocol is used to check whether or not a certificate has been revoked. In this context, it is used to give Apple the opportunity to revoke the “blessing” it has given to a specific piece of software. Whenever you start an application, MacOS checks back with the OCSP server. ## Resolution There are two ways to prevent MacOS from checking back to Apple. Local patch ```bash echo 0.0.0.0 ocsp.apple.com | sudo tee -a /etc/hosts ``` ## Router patch ## Discussion In fact, Apple does not associate the information coming with this request to any person or any IP address. Apple does also not track, when you start an application. Apple could figure out, which software vendor an application is coming from (thinking about Microsoft, that leaves a lot of possibilities). In the end, it is a simple check whether a certificate is valid or not. Security professional criticized that a man in the middle attack is possible and you might start an application of which the certificate is revoked. The data itself is also transferred over HTTP without encryption. So a 3rd party could get an idea than somebody runs software from a specific software vendor. Keeping aside the security concerns, it could be a little bit slower to start an application with a low bandwidth internet connection. In that case, it could make sense to block the request. ## Useful links [https://www.sentinelone.com/blog/what-happened-to-my-mac-apples-ocsp-apocalypse/](https://www.sentinelone.com/blog/what-happened-to-my-mac-apples-ocsp-apocalypse/) [https://www.theverge.com/2020/11/16/21569316/apple-mac-ocsp-server-developer-id-authentication-privacy-concerns-encryption-promises-fix](https://www.theverge.com/2020/11/16/21569316/apple-mac-ocsp-server-developer-id-authentication-privacy-concerns-encryption-promises-fix) # Map a shared drive on MacOS ## Introduction Mapping of network drive seems to be a big issue. Hopefully this manual brings a little light into the fog. ## Requirements Any kind of network resource, that offers any kind of network share. A network resource can be:No Quorum error
It can happen, when other machines of the cluster stop functioning. ## Resolution ```bash pvecm expect 1 ``` ## Useful links [No quorum error](https://forum.proxmox.com/threads/no-quorum-error.113459/) [Definition Quorum](https://pve.proxmox.com/wiki/Cluster_Manager#_quorum) # PVE - Can't lock file ### Can't lock file [https://dannyda.com/2020/05/1 1/how-to-fix-proxmox-pve-cant-lock-file-var-lock-qemu-server-lock-xxx-conf-got-timeout-proxmox-cant-shutdown-virtual-machine/](https://dannyda.com/2020/05/11/how-to-fix-proxmox-pve-cant-lock-file-var-lock-qemu-server-lock-xxx-conf-got-timeout-proxmox-cant-shutdown-virtual-machine/) manual SSH: goto /run/lock/qemu-server delete lock-xxx.conf qm unlock xxx Simple script: ```bash #!/bin/sh echo echo '-----AUTHOR: https://dannyda.com-----' echo echo '---Existing locks---' qm unlock $1 ls -l /run/lock/qemu-server rm -f /run/lock/qemu-server/lock-$1.conf qm unlock $1 echo echo '---Remaining locks---' ls -l /run/lock/qemu-server ``` ```bash ./killvm.sh xxx ``` # Import the voyager Root Certificate into your system ## Introduction To ease the use of servers/services of this domain it is recommended to trust the root certificate of this domain. This text describes how-to import the root certificate and start trust the different serves/services ## Vivaldi The Vivaldi browser is not so straight forward. You have to enter [chrome://settings/certificates](chrome://settings/certificates) Then it will display the certificate management; goto "Authorities": [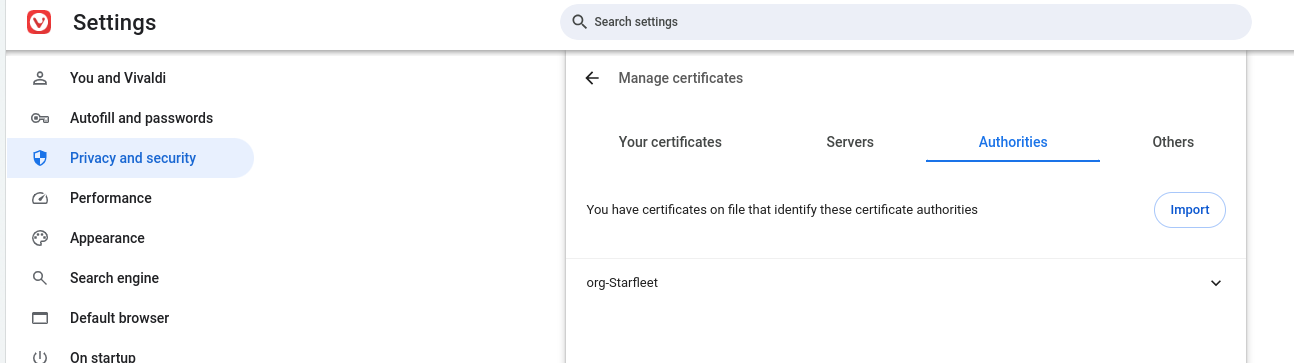](https://hwiki.simmy.org/uploads/images/gallery/2024-10/qU7image.png) "Import" all certificates you need.Don't forget to trust them.
## Brave Goto to the settings menu of your browser. Usually on the right upper corner. [](https://hwiki.simmy.org/uploads/images/gallery/2024-01/b2Egrafik.png) From the opening menu choose "Settings". Search for "certificate" or go to Privacy and Security Settings and choose "Manage certificates". [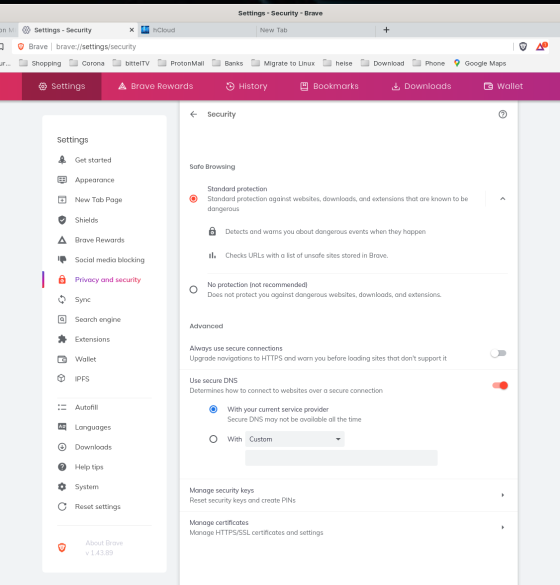](https://hwiki.simmy.org/uploads/images/gallery/2024-01/jpXgrafik.png) Goto "Authorities" [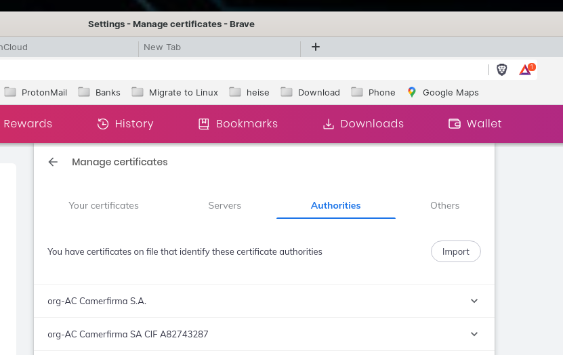](https://hwiki.simmy.org/uploads/images/gallery/2024-01/nKzgrafik.png) Select ca\_simmy.ch.crt Make sure that under trust settings "Trust this certificate for identifying websites" is enabled. The other options are for future use. [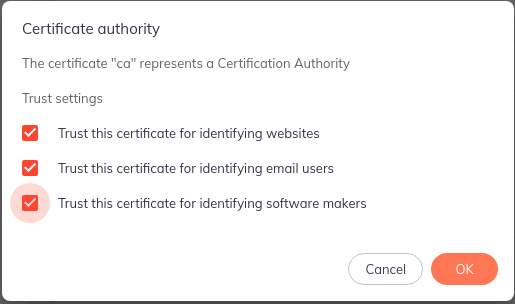](https://hwiki.simmy.org/uploads/images/gallery/2024-01/pXcgrafik.png)ACHTUNG: Nicht unter "Eigene Zertifikate" speichern, das Zertifikat funktioniert dort nicht!
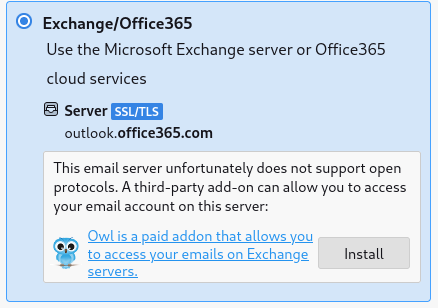
Danach einfach die Masken jeweils bestätigen. Hier nochmals der Pfad: [](https://hwiki.simmy.org/uploads/images/gallery/2024-01/S4lgrafik.png) Schliesslich auf "Fertig stellen" und freuen, dass die Verbindung nun verschlüsselt ist. # iOS bei iphone kann ich dir sagen: pack dir das irgendwo per web erreichbar, am besten in deinem LAN, rufe dann die .crt-datei mit -safari- auf und sage dem browser dann, dass er das crt installieren darf. das ist bisher die zuverlässigste variante. alles andere via "apple dateien" oder seafile oder oder funktionieren nicht, da der trigger nicht initiiert wird Patrick Beck, 23.10.2022 ## Download certificate Upper left corner, ca\_simmy.crt. # Add custom certificates to Apache [](https://hwiki.simmy.org/uploads/images/gallery/2024-02/1yHgrafik.png) ## Introduction In numerous cases you want to enable https on a webserver like Apache. So I decided a once and for all documentation for it. ## Configuration ```bash a2enmod ssl a2enmod rewrite systemctl restart apache2 ``` Edit the Apache configurationf file /etc/apache2/apache2.conf Add at the end: ```iniIf you are asked to install "OWL", please do it.
[](https://hwiki.simmy.org/uploads/images/gallery/2024-09/dUKimage.png) ## Hint You are now able to use E-Mail and Calendar functionality. So far Contacts/Address book are not working. Teams: On the left side you should find the Teams icon. Hover gently over it. It will then show all connected Microsoft Accounts. If you click on one of those account, a new tab will open for teams. Repeat until you opened all the Teams for your tenants. [](https://hwiki.simmy.org/uploads/images/gallery/2024-09/DDXimage.png) # CSA Webflow # Webflow User Guide ## 1. Logging In and Dashboard visit [webflow.com/login](https://webflow.com/login) [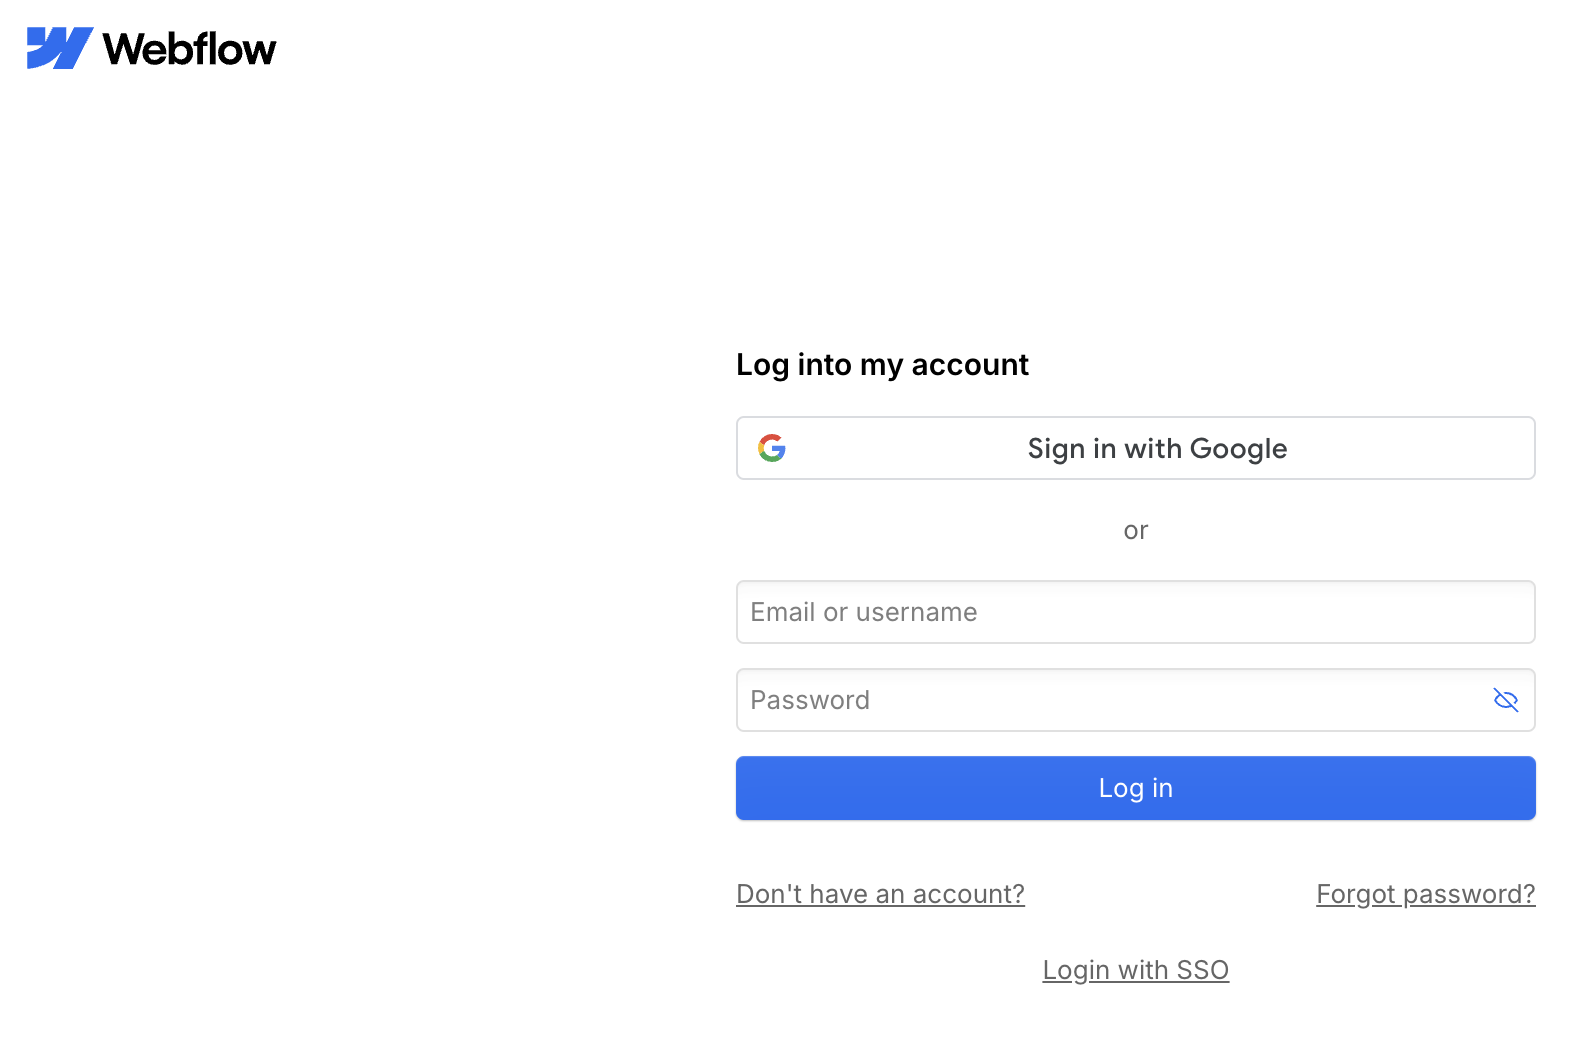](https://hwiki.simmy.org/uploads/images/gallery/2024-09/Yf3image.png) Enter username and password. [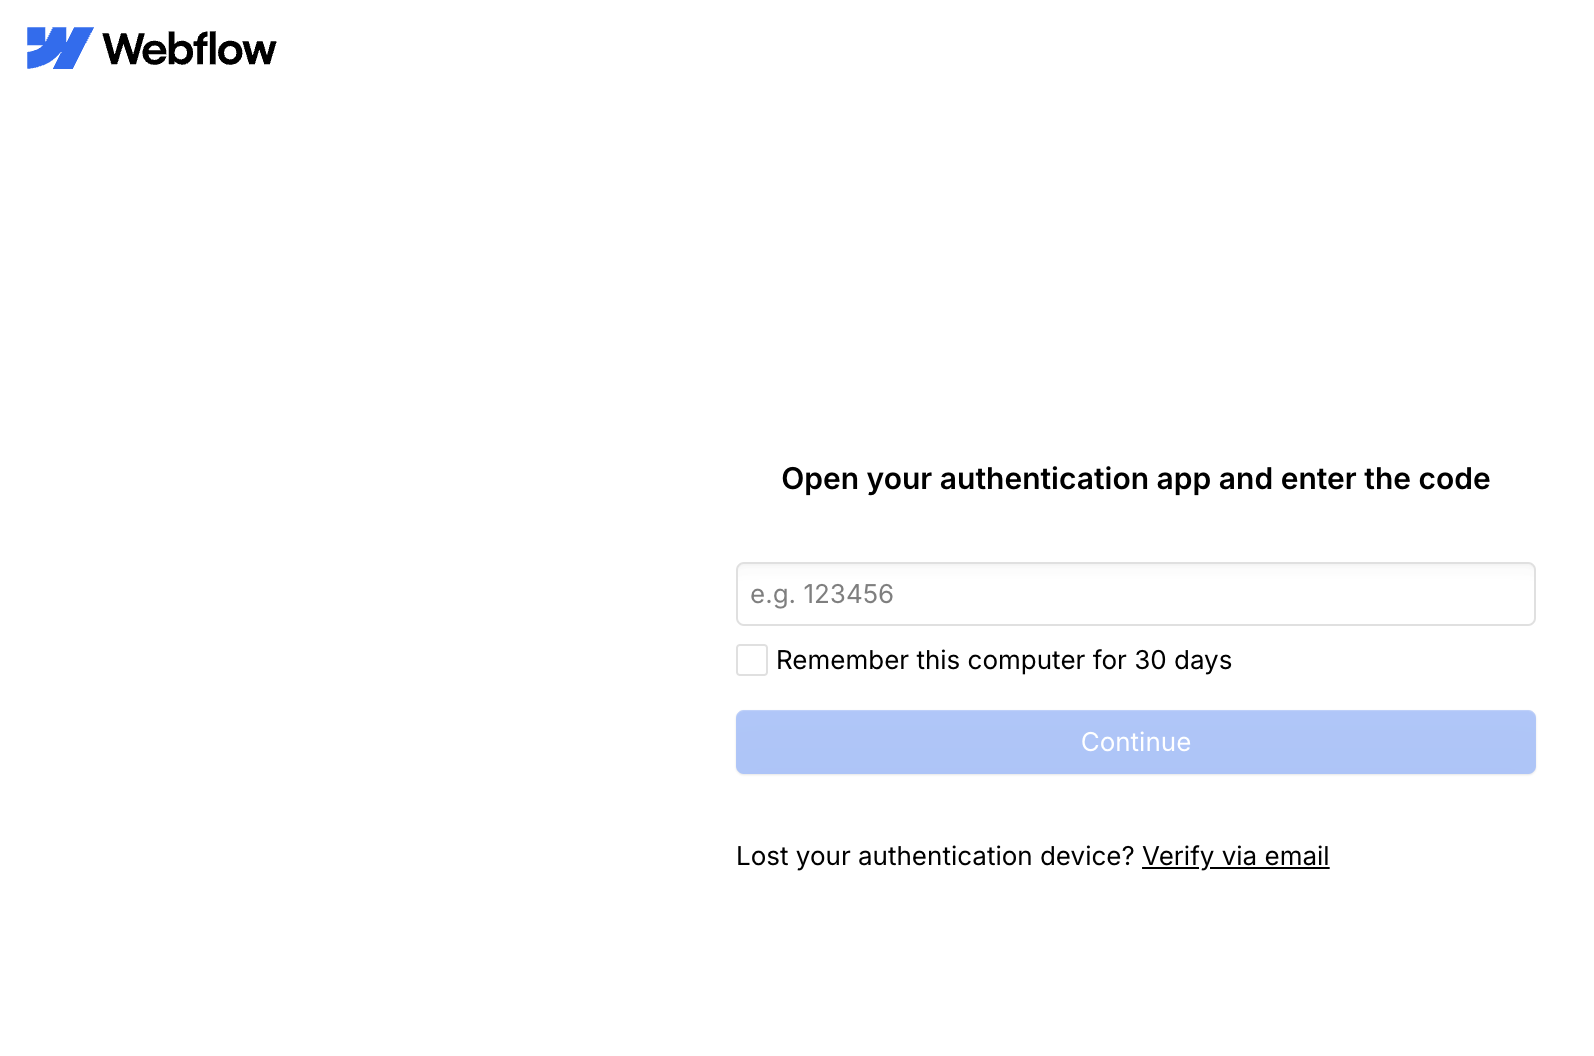](https://hwiki.simmy.org/uploads/images/gallery/2024-09/tusimage.png) Enter your TOTP Token. ## 2. Page Settings ## 3. Designer ### 3.1 Design Options ### 3.2 Components ### 3.3 Variables ### 3.4 Style Selectors ### 3.5 Images ## 4. CMS Functions ### 4.1 Collections ### 4.2 Creating and Editing Items ### 4.3 Text Formatting ### 4.4 Image Upload ## 5. Multilingual Support ## 6. Video Integration ## 7. Customizing Fields ## 8. Publishing ## 9. SEO and Social Media Optimization ### 9.1 SEO Settings ### 9.2 Open Graph Settings ### 9.3 Testing ## Tips and TricksDOCKER\_OPTS="--dns=192.168.1.2 --dns 192.168.1.25"
It's mandatory to keep this DNS configuration up to date. Otherwise NPM will not be able to resolve internal addresses.
```bash sudo systemctl daemon-reload sudo systemctl restart docker sudo docker run --rm alpine sh -c "cat /etc/resolv.conf && nslookup hfile.simmy.org" ```